Using quake3 lighting in Unreal Engine
2023-06-20
I have great nostalgia for the "look" of y2k-era games. Quake 3, Half-Life, Thief, Soldier of Fortune, Shock 2, Deus Ex, MOHAA – The way that lighting was calculated is something not replicable by modern engines, and the restrictions and tools of the time produce very unique results that really "sell" the feeling of playing a game from that era.
Recently I’ve built a workflow that brings those lighting results into Unreal directly, using the original map compilation tools to do so, this post goes over how it works.
A note before continuing, while I use side-by-side examples that might make quake3 lighting look or sound superior, that is absolutely not true for most use cases. The only reason these kind of comparisons are relevant is because my goal is a fundamentally old approach to designing levels, and does not apply to modern development. If you aren’t already aiming to do this in a project of your own, don’t get convinced that it’s a good idea.
UPDATE 2023-07-17; I’ve put in further work to port quake lightgrids, which replaces the section here that goes on about "lightvol". While the original hack is left here for posterity, anyone interested in a "part 2" of this should consult that piece.
- Before/After
- High-level workflow
- What makes y2k-era lighting different?
- How lightmaps are made
- How BSP data is stored
- Map compilation tools
- New tool, q3bsp2gltf
- Virtual Texture lightmap
- Bypassing Unreal lights - lightvol
- Bypassing Unreal lights - dynamic lights
- Update; q3map2 vs bloodmap
- Why can’t you just…
- Footnotes
Before/After
A bit of a top-line teaser for those who aren’t interested in all the details, taken from a small experiment map put together largely for this purpose.
| unreal lighting | quake3 lighting |
|---|---|
 |
 |
Wider shot of the final result.
High-level workflow
- make map in Trenchbroom
- (or any editor capable of making .map files)
q3map2- compile to a bsp and do light passes
q3bsp2gltf- (newly created for this project) to export the bsp geometry, atlas lightmaps, and re-uv vertex LM coords
blenderto convert GLTF to FBX- (this isn’t strictly necessary, but for Unreal it’ll be necessary for workflow purposes)
This is all, naturally, automated by a script.
Within Unreal;
- make a base material that blends LM to base color and vertex color
- make instances per-texture being used
- set static mesh to use lighting channel 1 for lighting
What makes y2k-era lighting different?
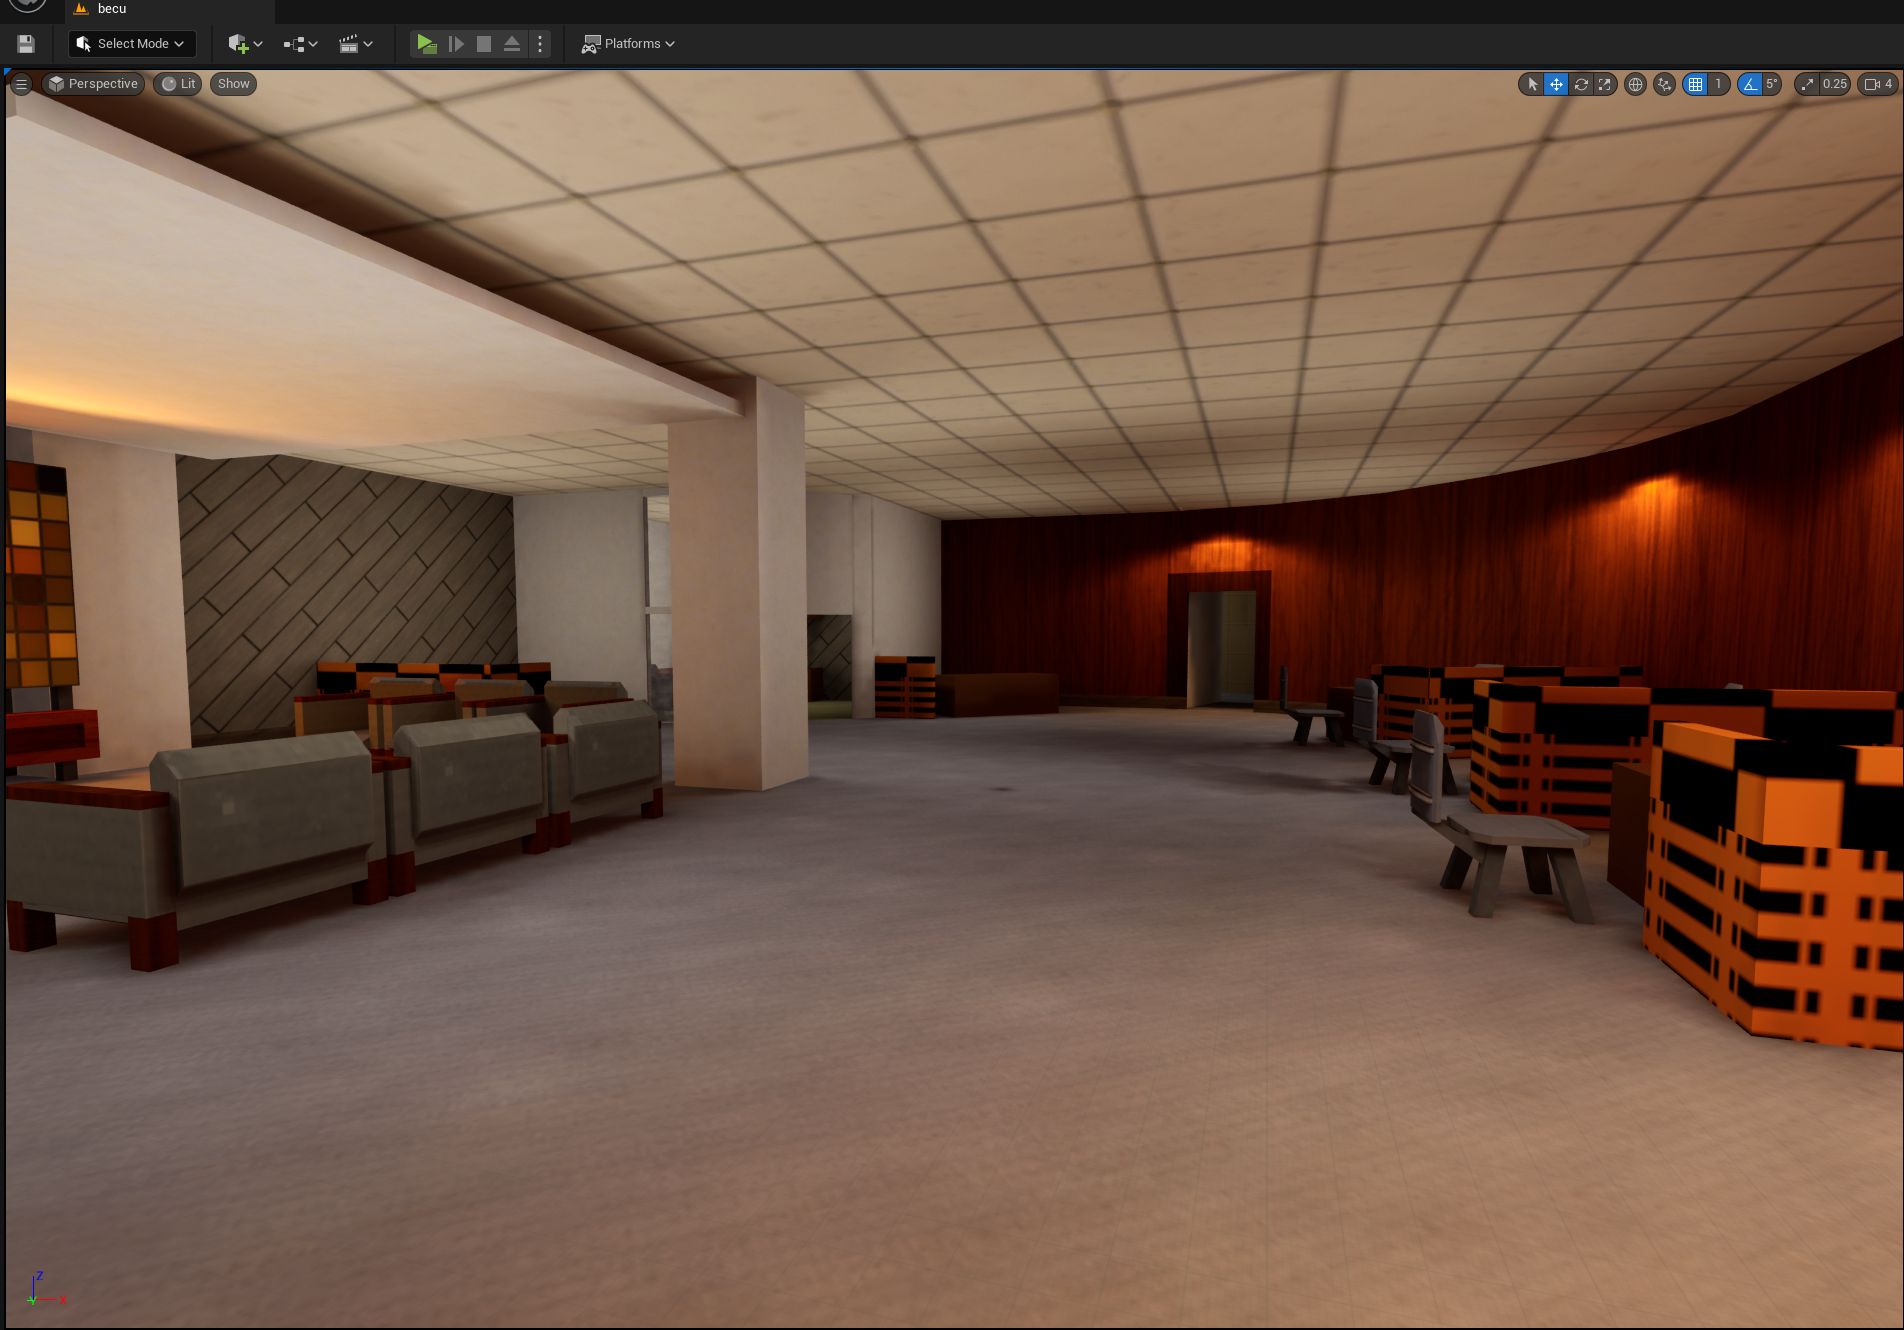
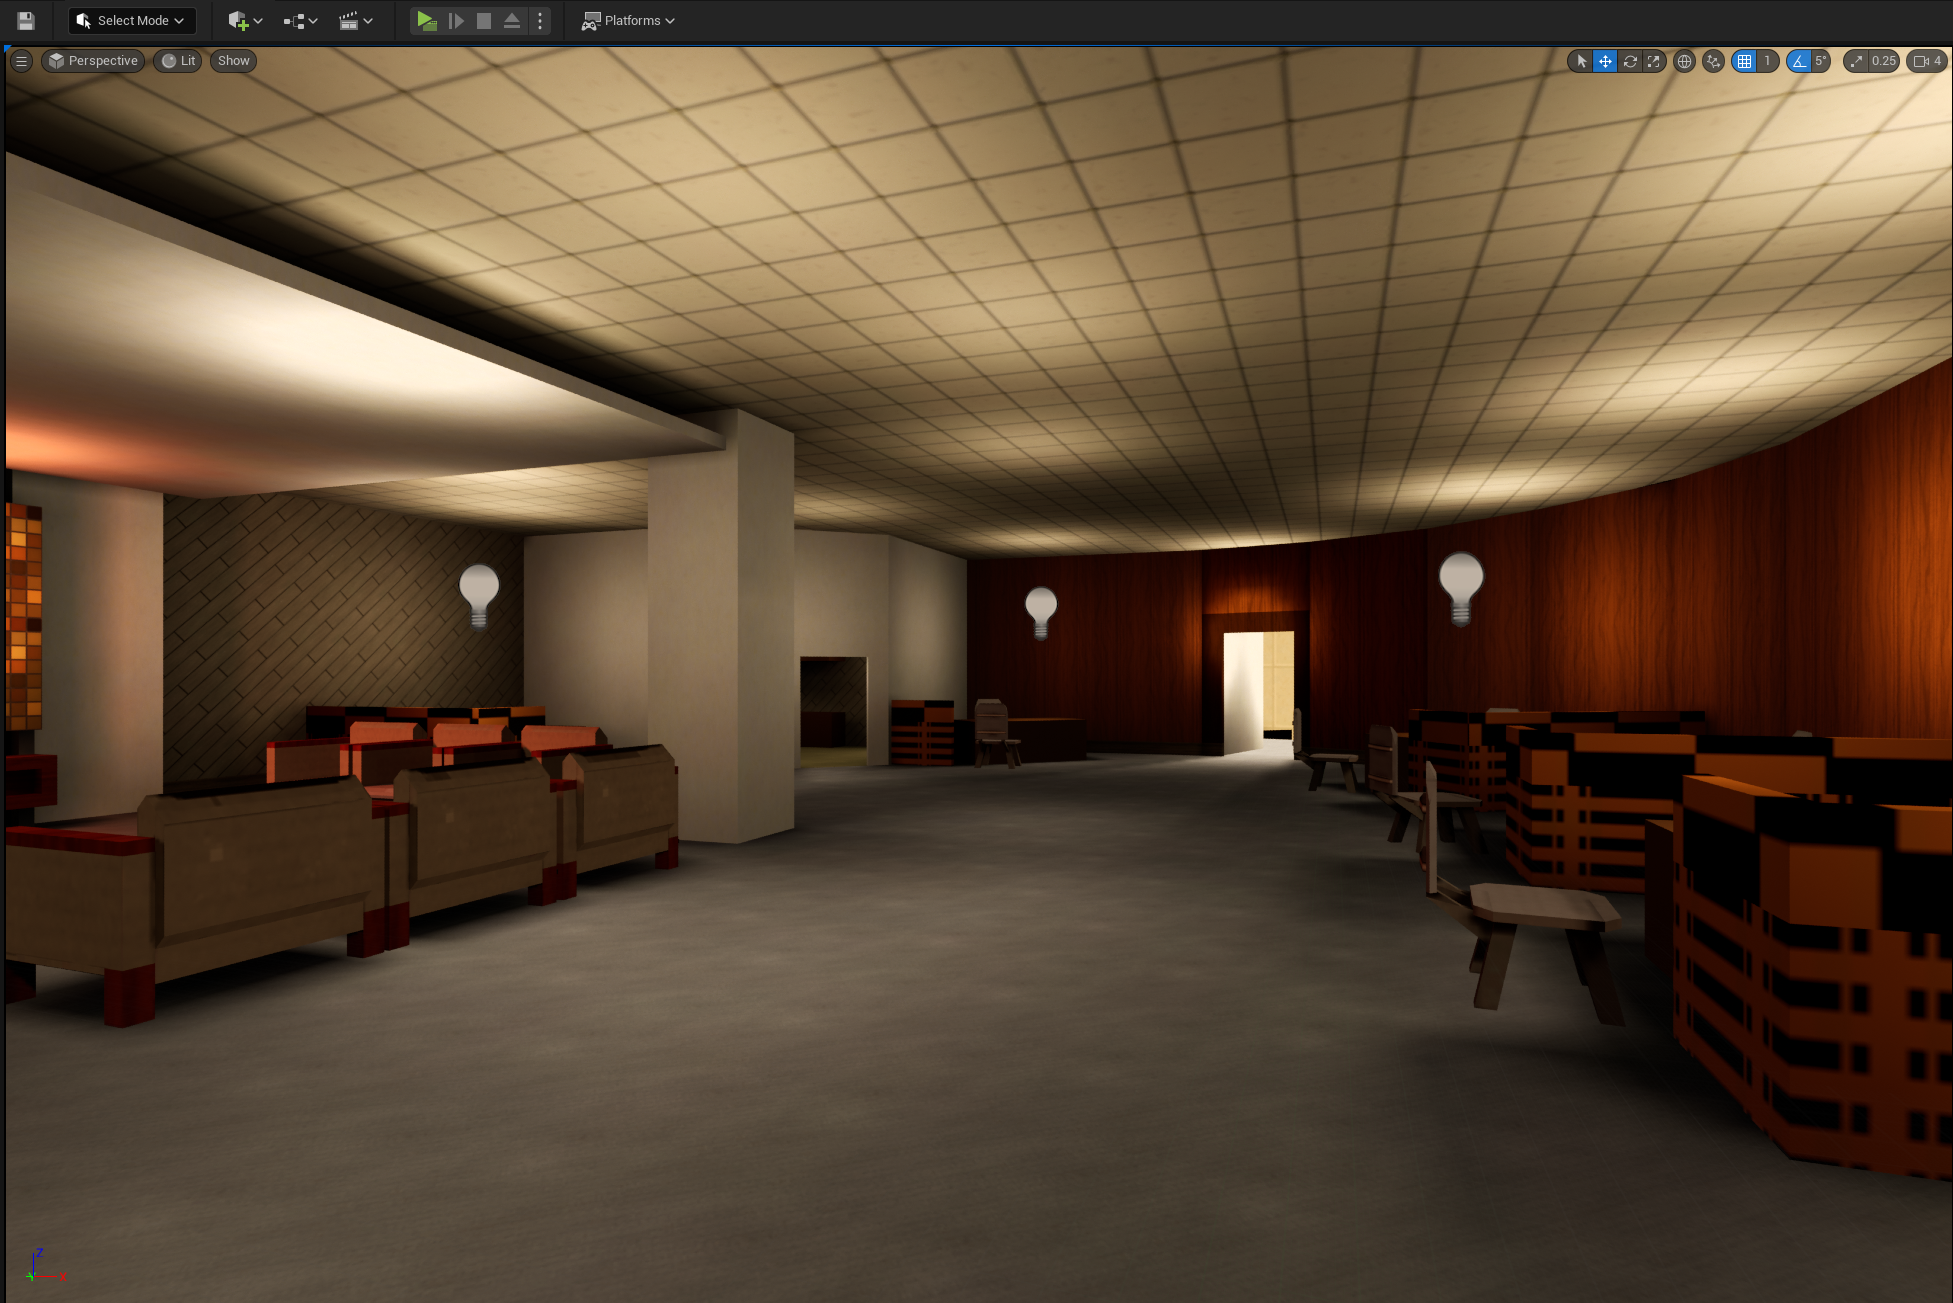
Lights in y2k-era games couldn’t brighten any surface, only their absence could darken surfaces.
| unreal | quake |
|---|---|
 |
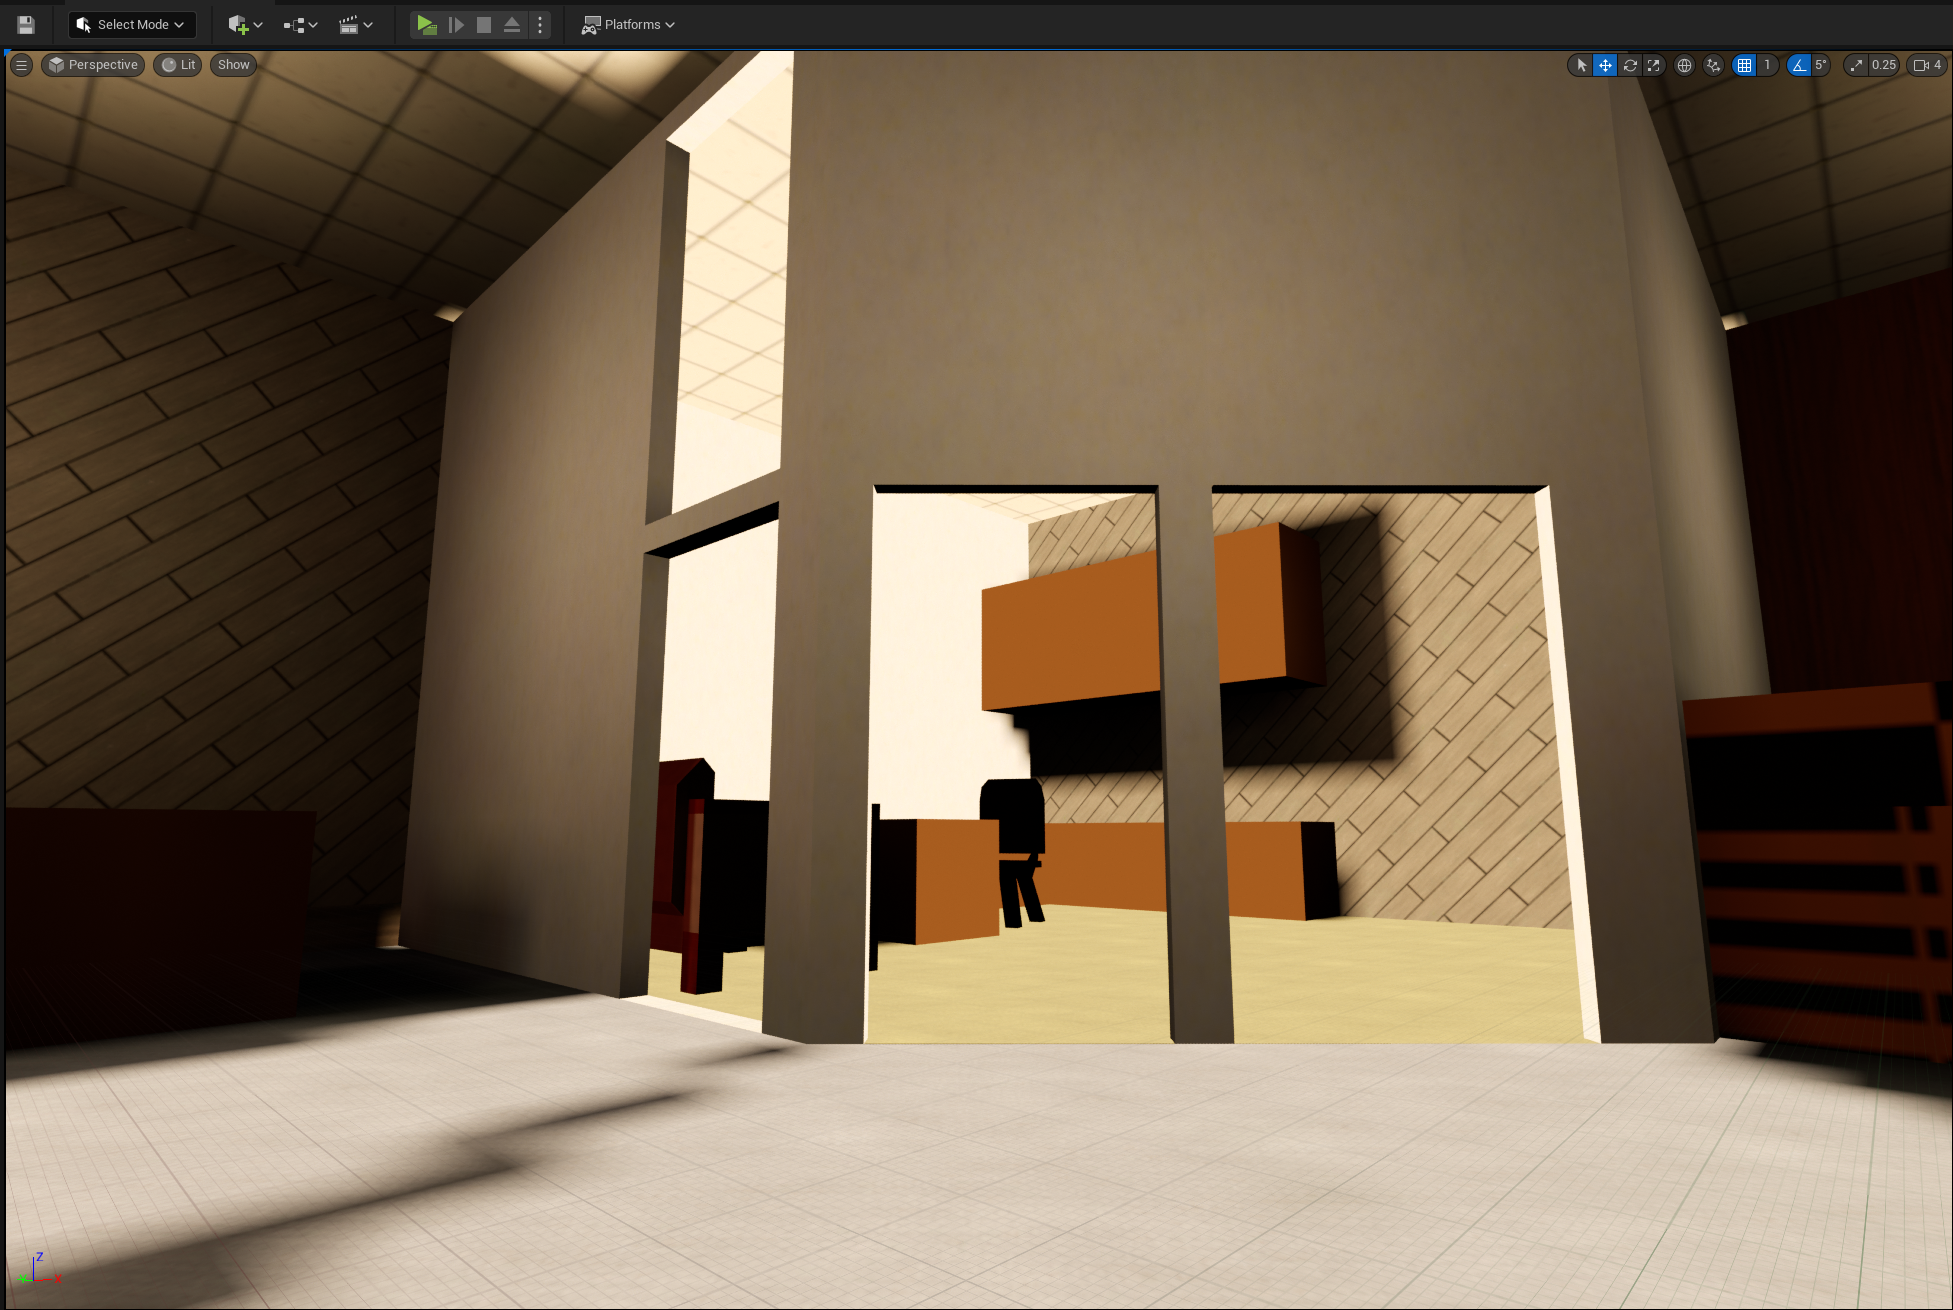 |
Specifically, notice the wood cabinets, back wall, and carpeted floor.
Unreal, here, uses "overbrighting" to brighten the mesh because a bright light is near it. But Quake can’t, instead it "peaks" at 1.0 brightness for quite a distance, before falling off normally elsewhere.
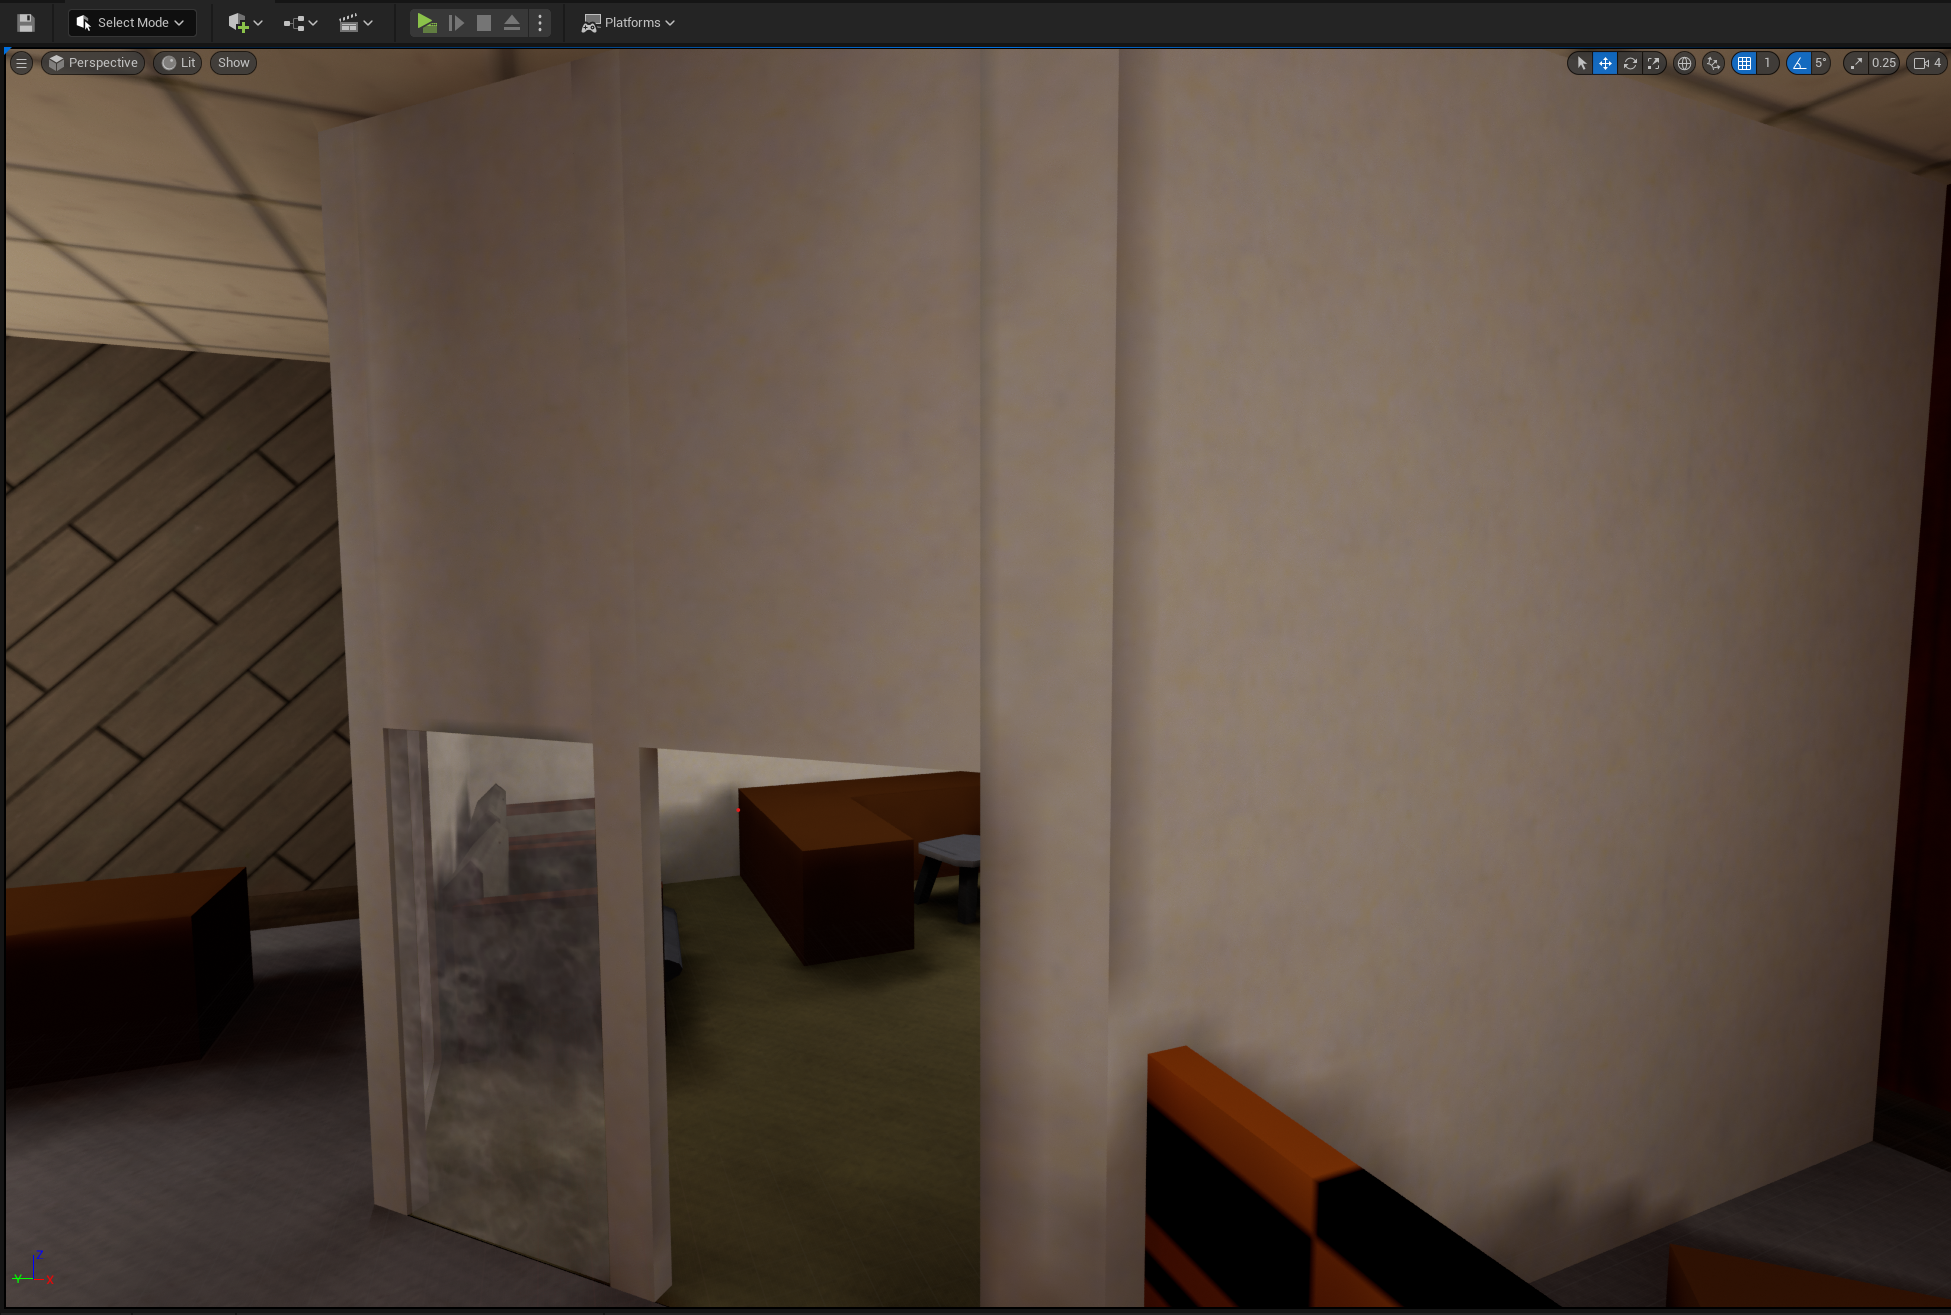
Next, they had a constant luxel resolution across all surfaces in the world (about 2sqft for quake3) (yes i know derivative engines used _lightmapscale). All surfaces are treated as part of the whole world, the map isn’t segmented into several meshes (in the way we think of meshes today, anyway). Modern engines typically have a lightmap per-mesh, meaning that you can increase or decrease the lightmap resolution depending on the surface you’re working with - a neat trick, but also the cause of a lot of shadow bleed, lighting build times, and optimization (both at runtime and build-time).
| unreal | quake |
|---|---|
 |
 |
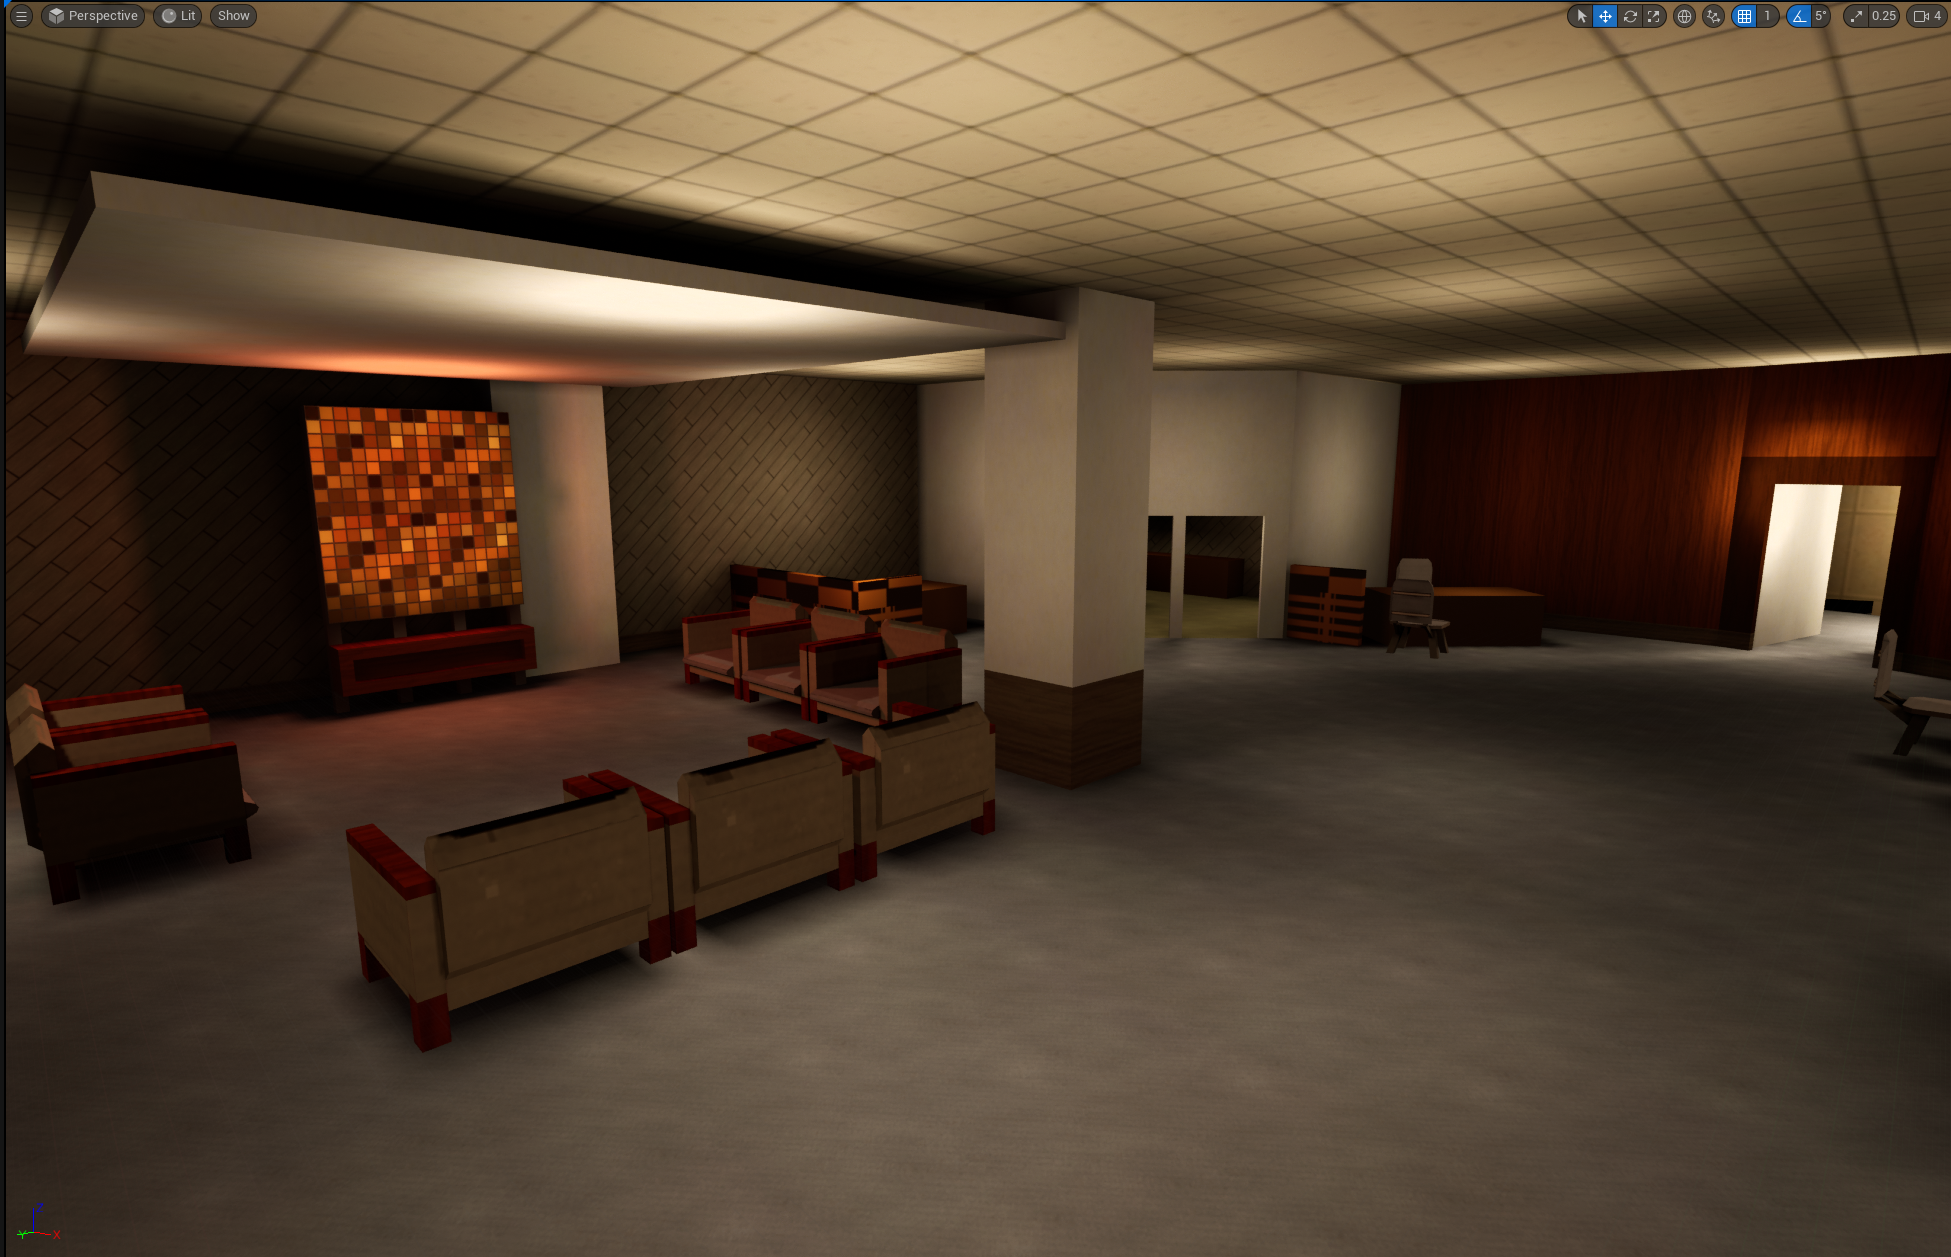
Notice how, in Unreal, the corner where the office walls meet has shadow bleeding - where shadows creep into surfaces they really have no business being in. Whereas in Quake, lighting is smooth across the entire surface (we’ll come back to this later, for those who have objections).
Finally, older games had a strong incentive to not lightmap surfaces if they didn’t need to. Lightmapping costs video memory, disk space, and (at the time) could almost double the cost of rendering a face. So, map compilers at the time generally had the option to use vertex colors to "shade" surfaces that had relatively even coloration from the lighting phase.
| vertex shading OFF | vertex shading ON | annotated |
|---|---|---|
 |
 |
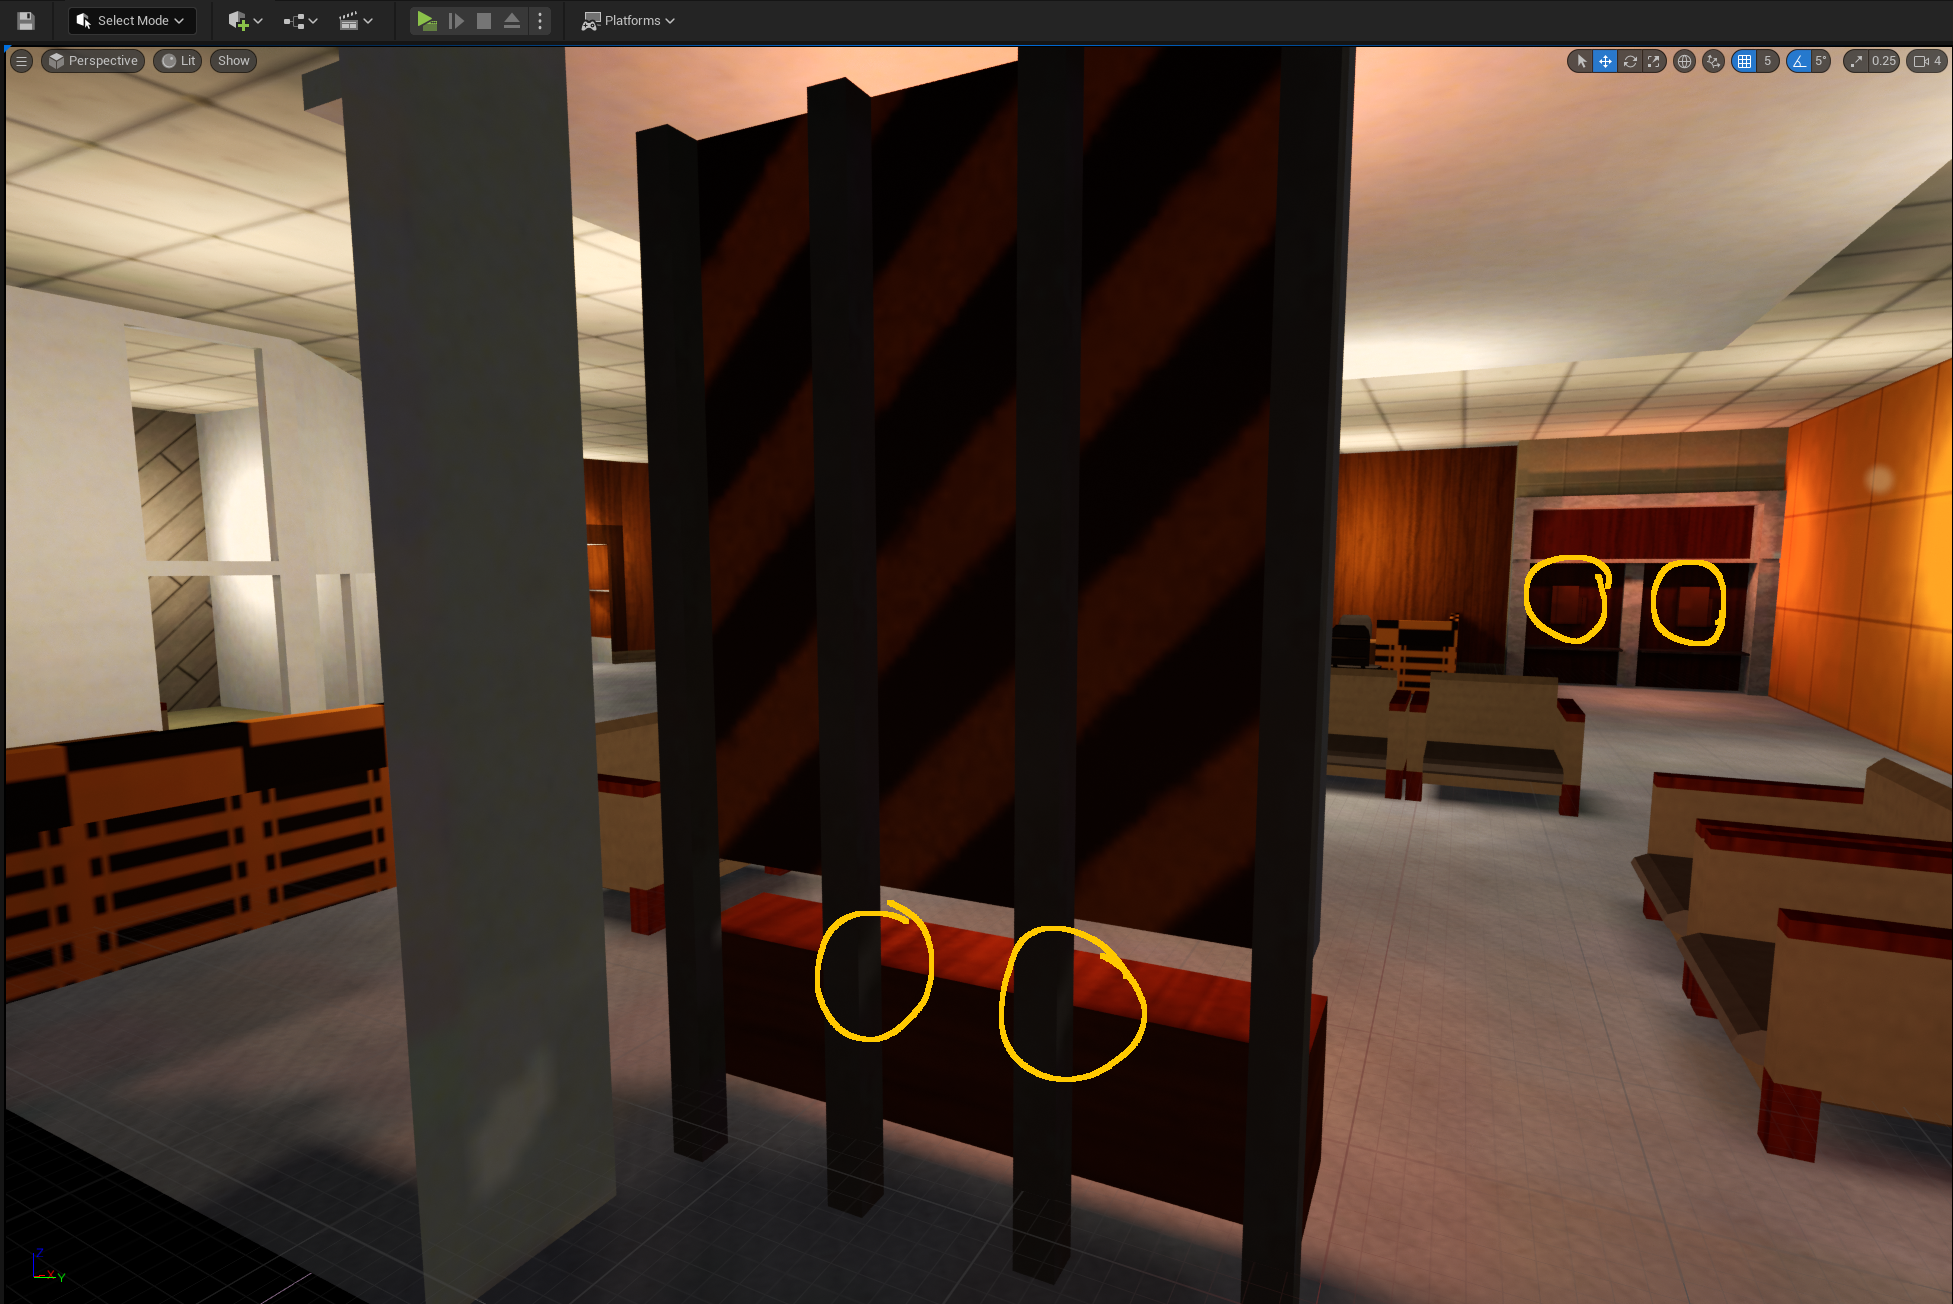 |
(annotated to make clear what changes, be sure to click into the images to inspect it, this is a subtle one)
Note the backing and bars of the art element could have a lightmap that spills a little light into them, but if they’re vertex shaded that’s not present. Same goals for the "phones" in the background, which lose a little bit of light fidelity, but it’s hardly noticeable unless you’re looking.
This was a very common technique circa ~1997. If you play Dark Engine or Goldsrc games, you’ll start to notice this everywhere. Notably, in Brian Hook’s GDC talk from 1999, he lamented that some consumers couldn’t tell the difference between Forsaken and Quake. Forsaken, for its time, didn’t even use lightmaps at all, relying entirely (don’t quote me on this, he seems to say it) on vertex shading and faked lighting in textures.
Modern engines seem (to my knowledge, i have no specific insider information here) to have mostly abandoned the practice of vertex shading, since lightmapping everything in a scene is trivially viable these days. But in practice vertex shading creates a very subtle effect that contributes to the aesthetic of games from that era.
How lightmaps are made
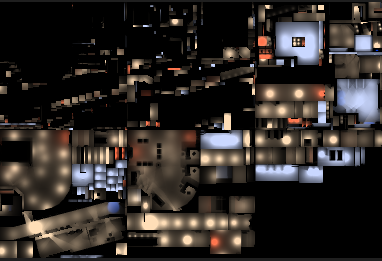
A quake3 lightmap is a 128x128 RGB image, in which each pixel corresponds to a single "luxel" (like a texel, but for light). Broadly, every surface is split into fixed-size squares along a plane (aligning to the world’s grid), each one’s lighting value is calculated, and the results are stored as luxels (pixels) in a lightmap image. Note that a single map might have dozens of lightmaps, all covering a roughly equal world density, it’s not one giant texture, and the engine pages lightmaps in and out as needed.
When applied ingame, the lightmap luxels act as a multiplier, changing the base color value (taken from the texture) from 0 - 1. A fully lit surface has the same color as the texture, and a surface at 50% lighting is half as bright as the original texture. If you’ve ever wondered why old game textures are so bright, it’s because of this – they could not be lit to be brighter than the texture itself (unlike games today).
Sidenote, some games added "overbright", which allowed the lightmap to go from 0 - 2, meaning it could brighten the texture it was applied to. But it wasn’t the way to light surfaces in most maps / games.
Let’s take a quick look at how lightmaps actually look;
| in editor | lightmap |
|---|---|
 |
 |
How BSP data is stored
kekoa proudfoot guide to q3 bsp format, still the definitive documentation on the matter, also morgan mcguire’s rendering quake 3 maps as well
BSP is broken up into "lumps", there being 17 total. Lumps are just contiguous structured bytes, where you read the bytes literally into floats, ints, and fixed-size arrays. The majority of them are in service of (you guessed it) binary space partitioning, dictating things like leaves, nodes and splitting planes. More on the other lumps later, because BSP has several things we could concern ourself with.
For now, we generally care about these lumps;
- Lump 01 - Textures
- Lump 10 - Vertices
- Lump 11 - Meshverts
- Lump 13 - Faces
- Lump 14 - Lightmaps
Some of this is self-explanatory, textures just names texture paths, lightmaps are RGB data, vertices define points - but what’s with meshverts? Let me quote Proudfoot on this one, because this took some heavy squinting;
The set always contains a loop of vertices, and sometimes also includes an additional vertex near the center of the polygon. For these faces, meshvert and n_meshverts describe a valid polygon triangulation. Every three meshverts describe a triangle. Each meshvert is an offset from the first vertex of the face, given by vertex.
In most applications, you have vertices (with attributes like position and UV), then polygons are defined by a sequence of indices pointing to verts. That’s roughly true of Quake - it does have vertices, and crucially for our purposes they contain two UV’s (one for base texture, one for lightmap), color, and normals. But there are no indices. Instead, each Face defines a range of meshverts and a vertex. To create indices, you do something like this;
meshverts from lump

for I in [0...face.num_meshverts] {
	index = face.vertex + meshverts[face.meshvert + i].offset
}
…I am sure that there’s a good reason for this, but it’s absolutely bizarre to me.
Also of note, Quake uses clockwise face winding, whereas GLTF defines counterclockwise (by default, but you can change it via transforms). This is an easy fix - walk backwards through meshverts instead of forwards. Also worth noting that BSP uses a left-hand Y-up coordinate system, whereas GLTF specifies a right-hand Z-up (the obviously correct one, by the way). Don’t forget to change normal coordinate system too!
We went over lightmaps, but they’re just contiguous 65,536 byte ranges of 24bpp pixels.
Map compilation tools
For compiling maps, I use bloodmap. Most would use q3map2, but finding a working version is troublesome, and I found it to be extremely unstable; often producing faces with light artifacts, bad vertex colors, or weird z-fighting-esque uv issues that lead the end results to be unusable. Bloodmap is a more recently updated version of q3map2 which fixes several bugs, has 64-bit builds, and produces results that I do not have to fight much with in order to use.
It (and all map compilers) are used about like this;
bloodmap -meta -bsp mymap.map
bloodmap -light mymap.map
NOTE:
-fs_basepathand-fs_gameshould be set to the same values as in Trenchbroom’s profile for the game. It’ll work without them, but the paraxial projection of textures onto brushes depends on texture resolution, meaning that if you don’t set it, you’ll get different results in the BSP than what TB shows you.
Easy enough, you made a bsp. But there’s no way to export it to a usable mesh with all the data intact. You can extract the lightmaps, but alone they’re not useful.
Ultimately, we need a tool that extracts BSP geometry into a standard format, retaining both per-vert UV coords, as well as color and vnorm info. And, since we live in 2023 and can easily load 4k textures, this tool might as well atlas the lightmaps together into a single image, and re-uv the vertices to match.
No such tool existed, so I wrote q3bsp2gltf. It has options to go further than this, supporting UDIMs, removal of invisible faces by texture name, renaming textures to fit Unreal idioms, and other stuff in that vein. It’s used like this;
q3bsp2gltf ./mymap.bsp
It’ll generate mymap.gltf and T_bsplightmap.png, ready for import into your favorite engine.
q3bsp2gltf is unfortunately not currently ready for a proper open source release, requiring a little elbow grease. Suffice to say, it does what it says on the tin. Expect more in a few months.
So, great, but the Unreal gltf importer (and the various third party plugins) generally doesn’t look for existing materials by name, the way the FBX importer does. This means that we’d need to create material instances for every texture used per-map, which sounds like a lot of work.
The solution is converting the gltf to an fbx, which I did with a blender python script. It’s fundmentally similar to a previous post I made. The end result (and FBX) can be imported/reimported by Unreal, which correctly discovers existing materials to use for this, instead of requiring one per-map.
Full precision UV
Addendum 2023-07-25
When importing the model, make sure to "use full precision UV" in the import settings of the static mesh. Otherwise you’re likely to have lightmap "bleeding" where it reads incorrect lightmap pixels for given texels.
Virtual Texture lightmap
If we import our model and make materials, we’ll have to bind a specific lightmap texture to a specific base texture for each material instance. That’s not ideal for all the same reasons that we had for converting to FBX. But there’s a solution, we can make a single material instance per-texture and have it use a different lightmap per-level.
Unreal, as of 4.27, supports Virtual Texture Streaming. Put simply, this allows you to collect several individual textures together as a "virtual" texture. It’s not an atlas though, because the uv range of each texture is still exactly 1. That means that the first texture is at u-coordinate 0-1, the second is at 1-2, third is 2-3, etc.
To enforce that a specific texture corresponds to a specific uv range, UDIM’s are used. It’s a naming convention like this;
T_bsplightmap_1001.png, T_bsplightmap_1002.png, and T_bsplightmap_1012.png. It’s a little counter-intuitive (it’s not zero-indexed), but it ultimately gives a deterministic uv range to each texture by name, all while being able to render it like any other texture.
q3bsp2gltf supports UDIM-naming and re-uv’ing if the map name begins with four integers. So for instance, 1002_cool.bsp would have its lightmap atlas exported to T_bsplightmap_1002.png, and all the vertices’ lightmap coordinates re-uv’d from 0-1 to 2-3 – this re-uv is in addition to the re-uv that occurs as a result of the atlassing of all the 128x lightmaps together into a single texture.
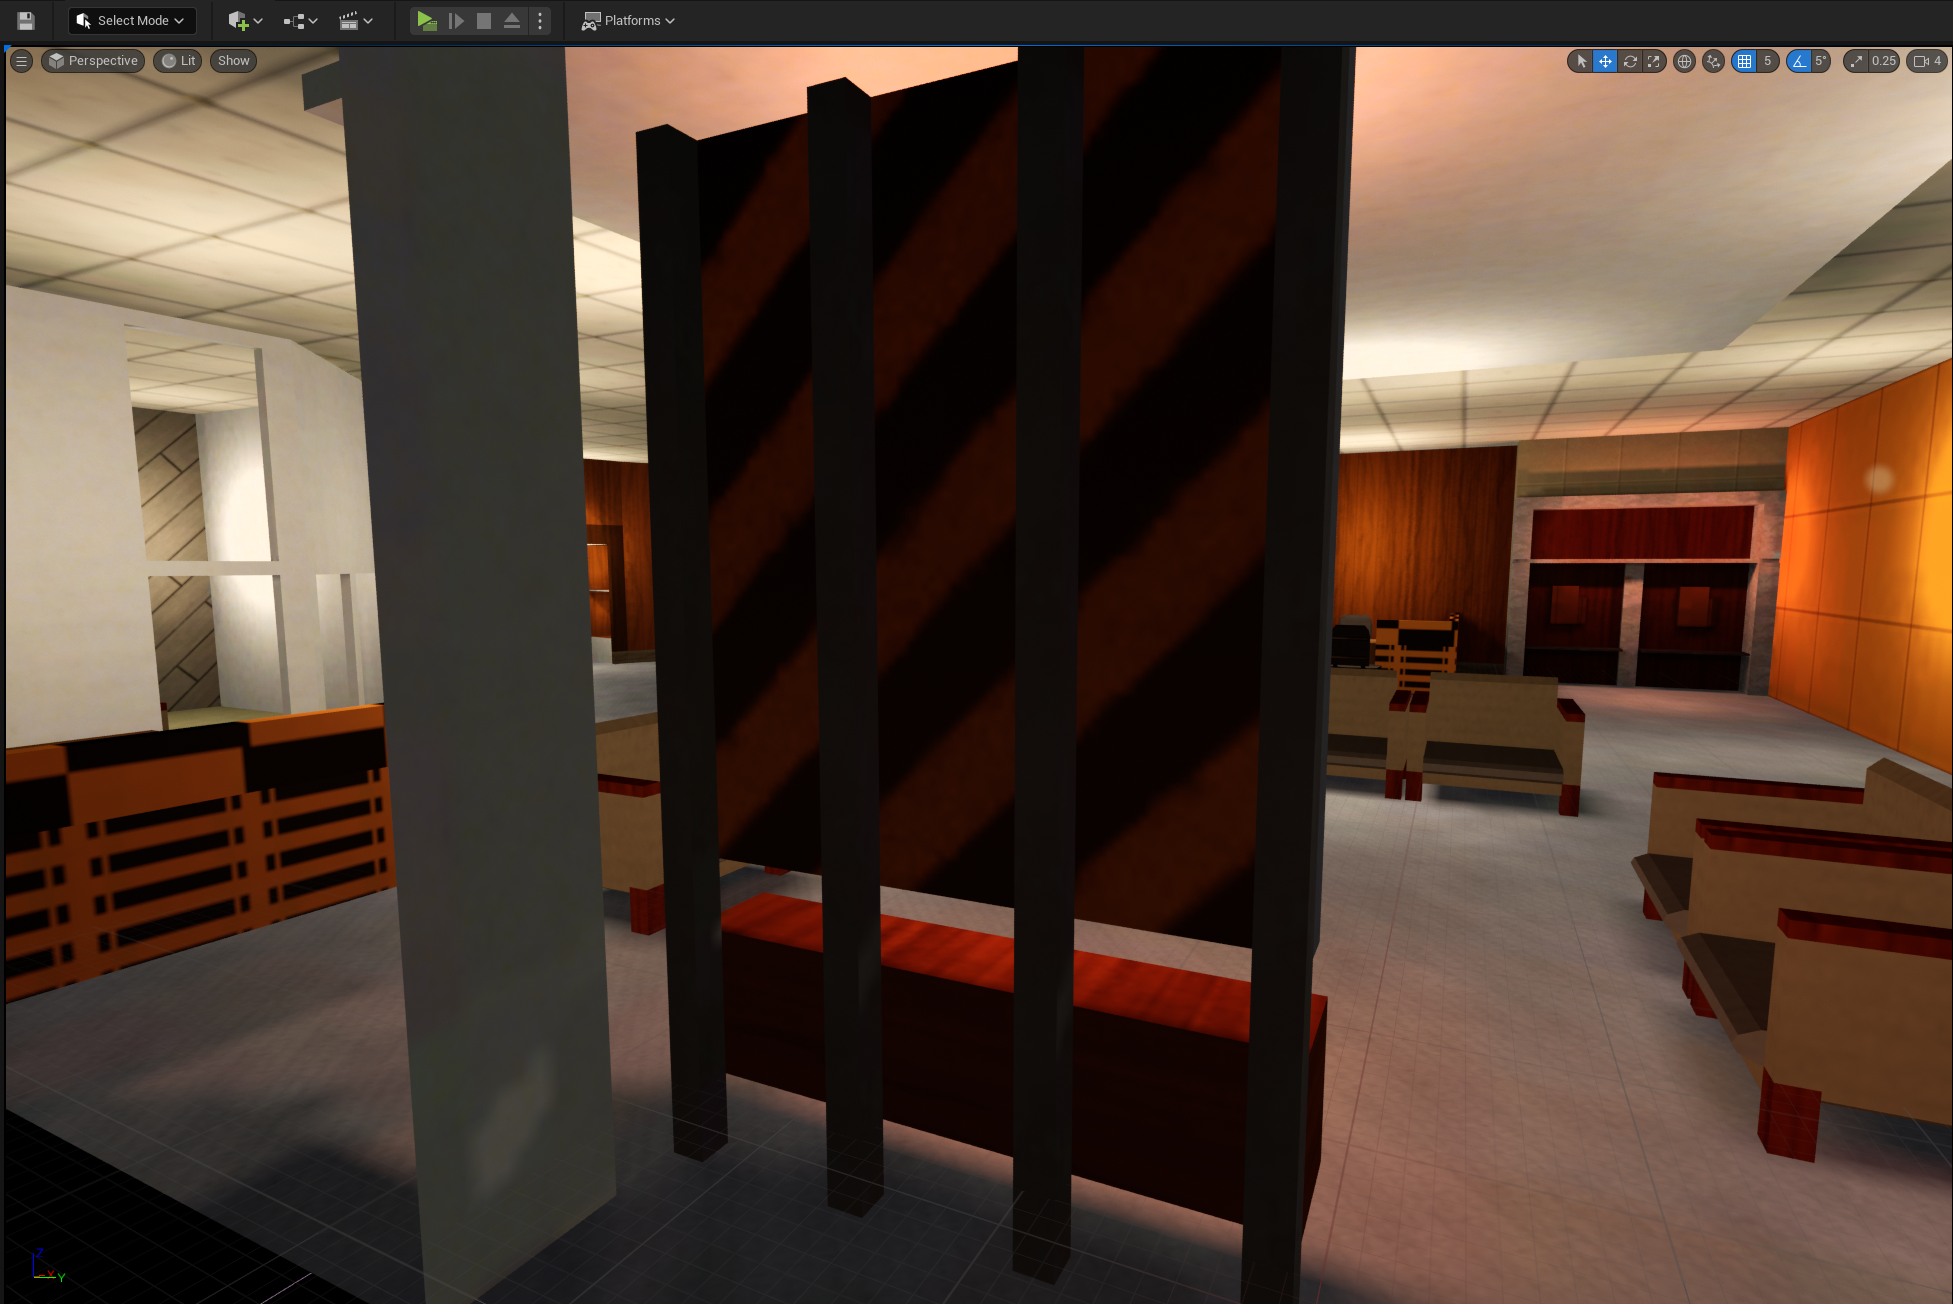
It’s probably worth showing what this material looks like;
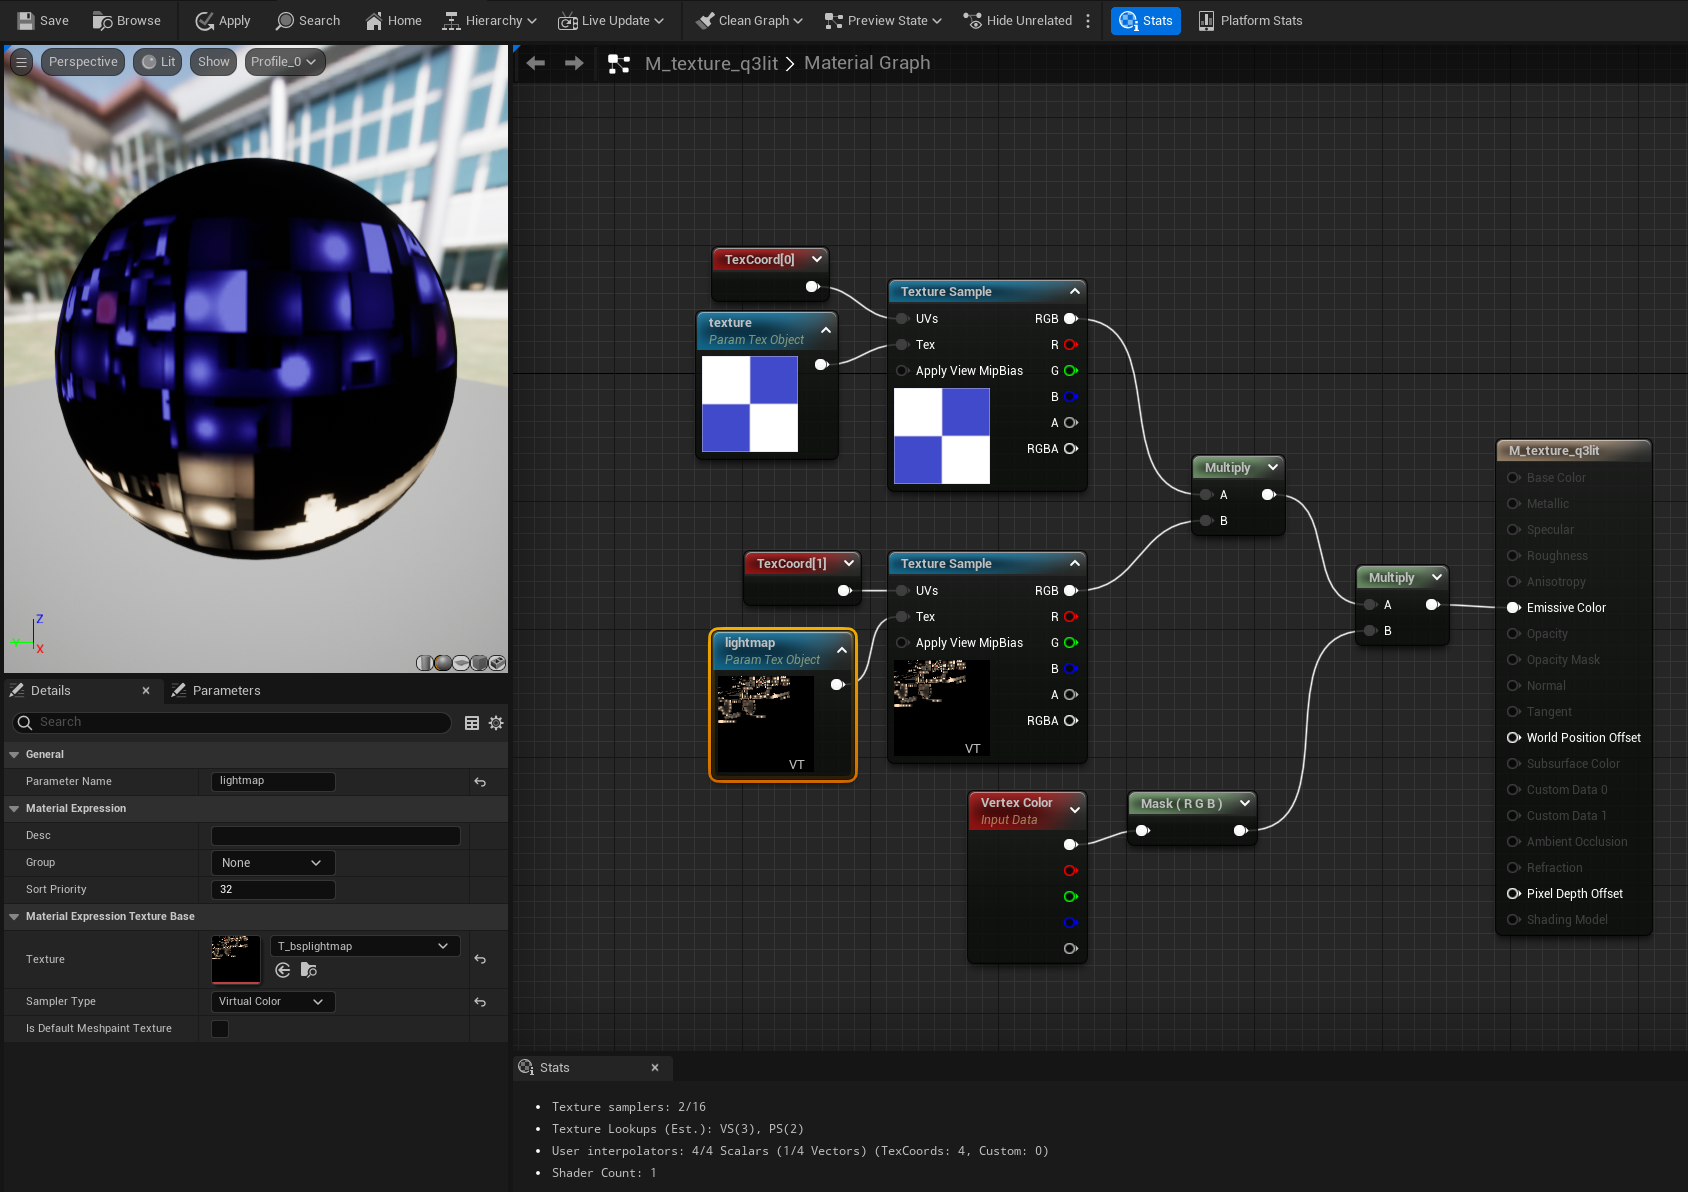
Note that the VT sampler must be set to Virtual Color to bring in that "VT" label at the bottom, and properly use VT.
Each material instance specifies the virtual texture (don’t forget to actually make it a virtual texture in the content browser), and a base texture as parameters. q3bsp2gltf has the option to convert all texture names to something like MMI_basename, where "MMI" indicates "map material instance" (useful so that you can continue using MI_ for other purposes with the same materials, without needing lightmapping).
Bypassing Unreal lights - lightvol
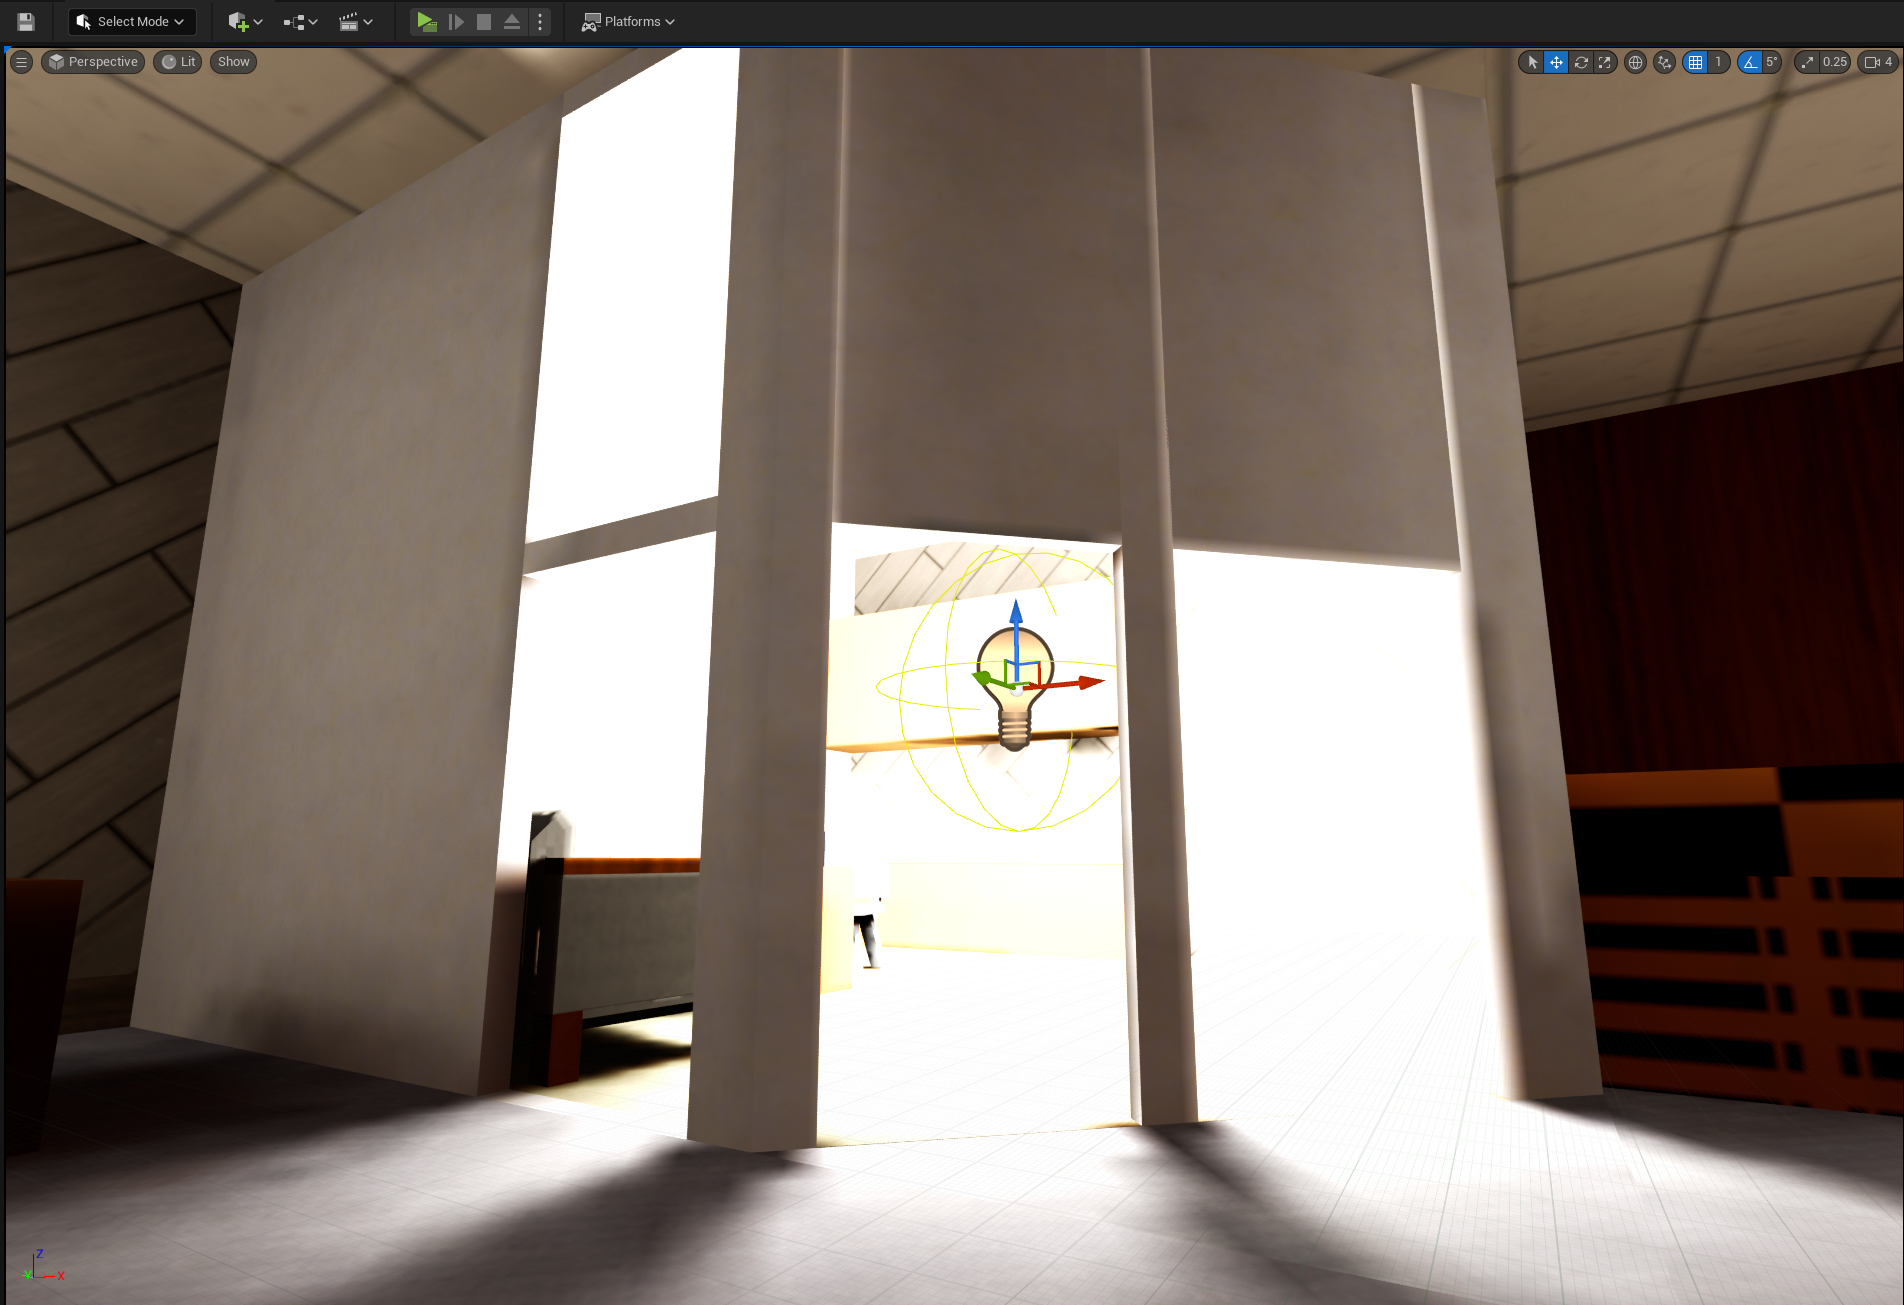
Great, so we have a model in Unreal, it has lightmapping, it looks great. But we’re missing two things; dynamic lights and light volumes.
You might remember that Lump 15 in a BSP is "lightvols". This divides the world up into a uniform grid (like voxels), and for each cell sets a color value. Any entity moving through a lightvol cell is colored accordingly. This is how games "shadowed" characters when they moved between areas with different lighting – just vertex colors by-position. Dead simple. There’s a few downsides though – it means that very often shadows are slightly offset from where the lightvol is that describes them. That means you can physically be standing in shadow and yet not be "shadowed" from the perspective of others in the scene. You’re probably familiar with this from games like Thief, where the lightvol data also determines how easy it is for enemies to spot you – and you swear you should be in shadow, but weren’t.
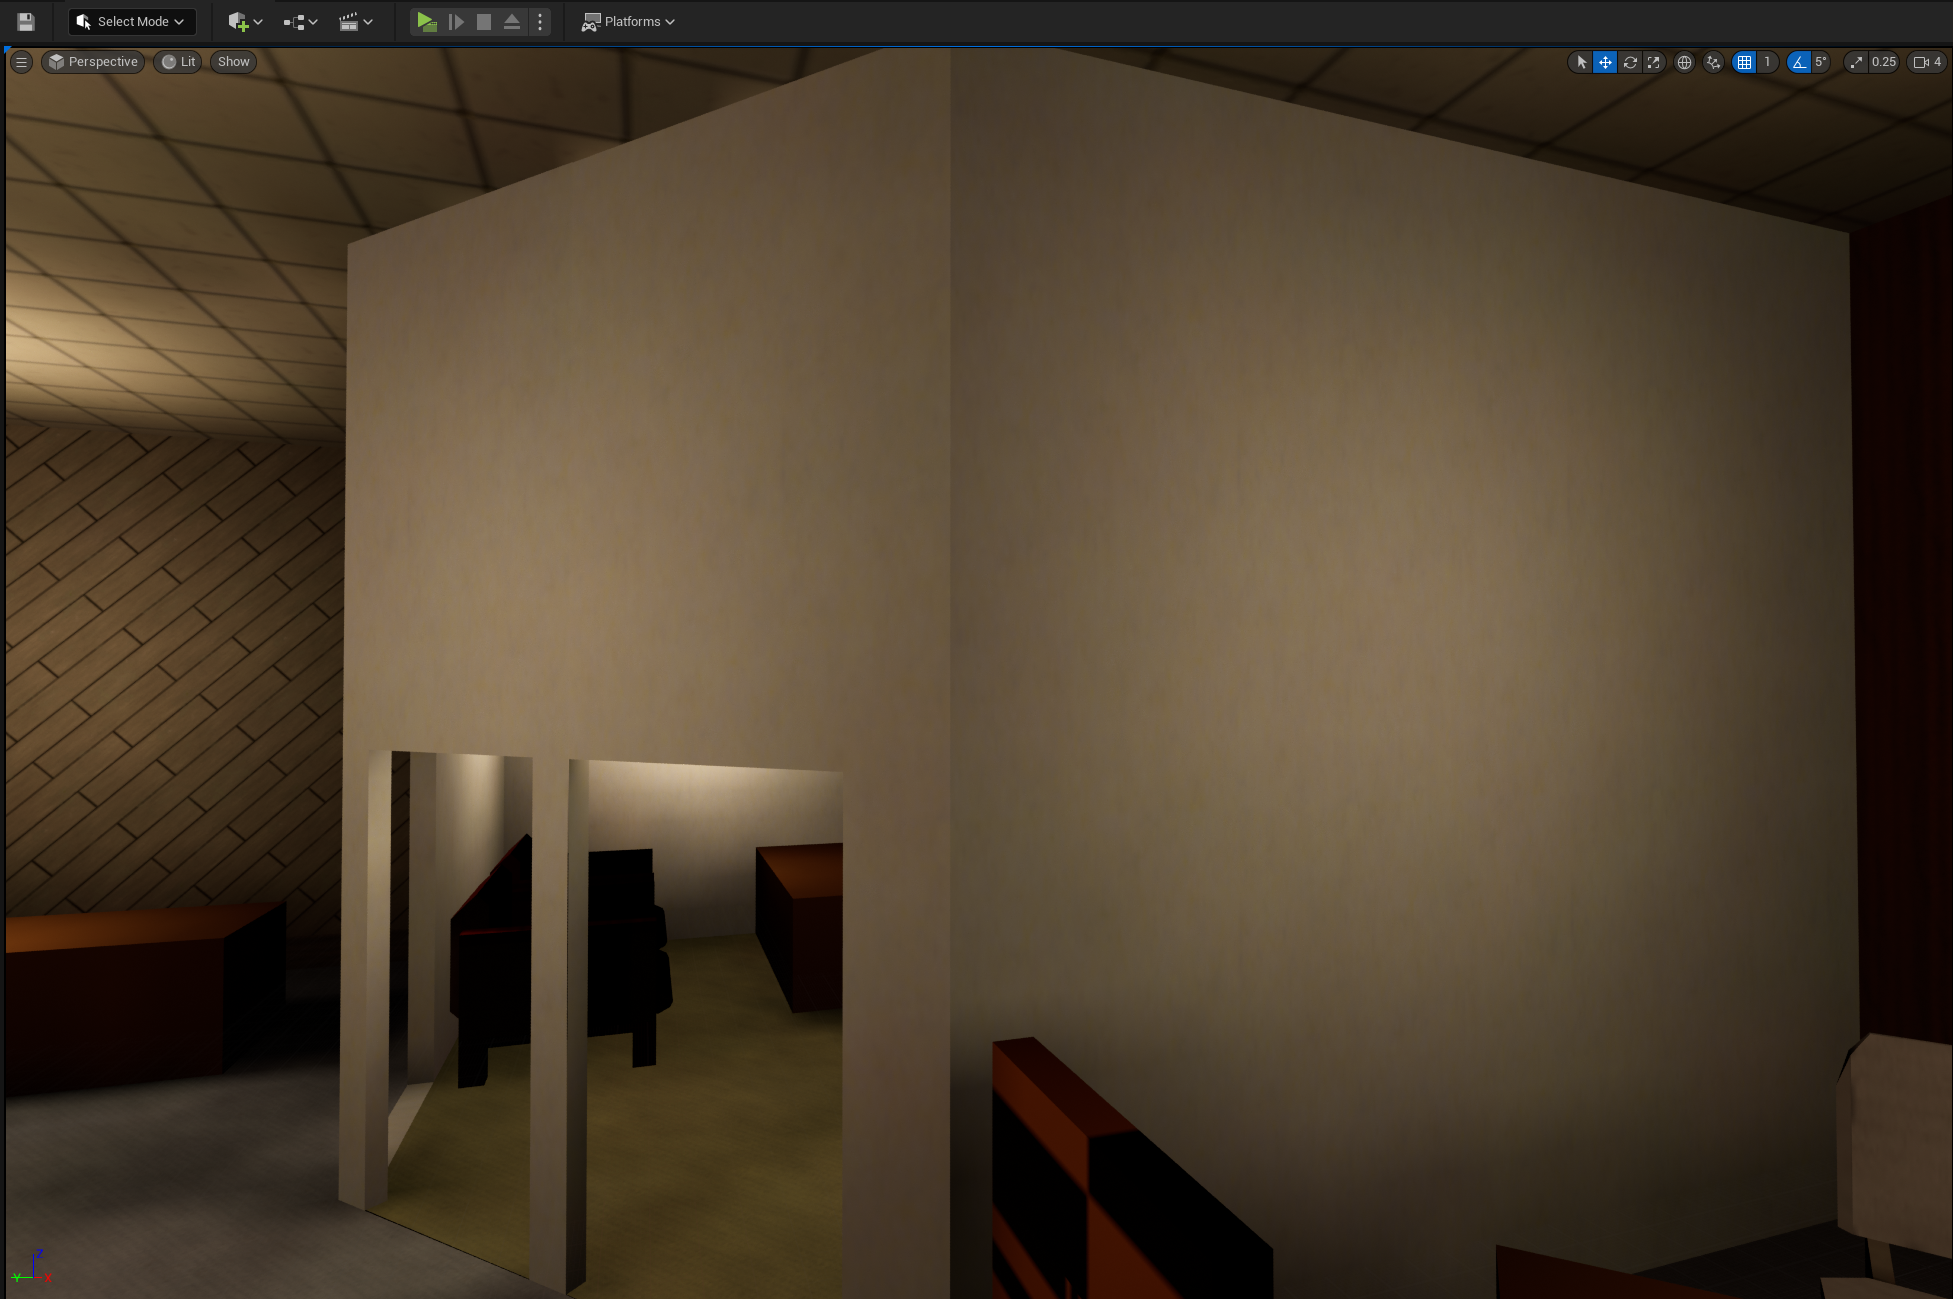
All modern engines retain this concept, but if we don’t put Unreal lights into our scene, there’ll be no lightvol information nor lightmap. Every entity will be pure black, and won’t receive any light the way that the geometry does. It’d look like this;
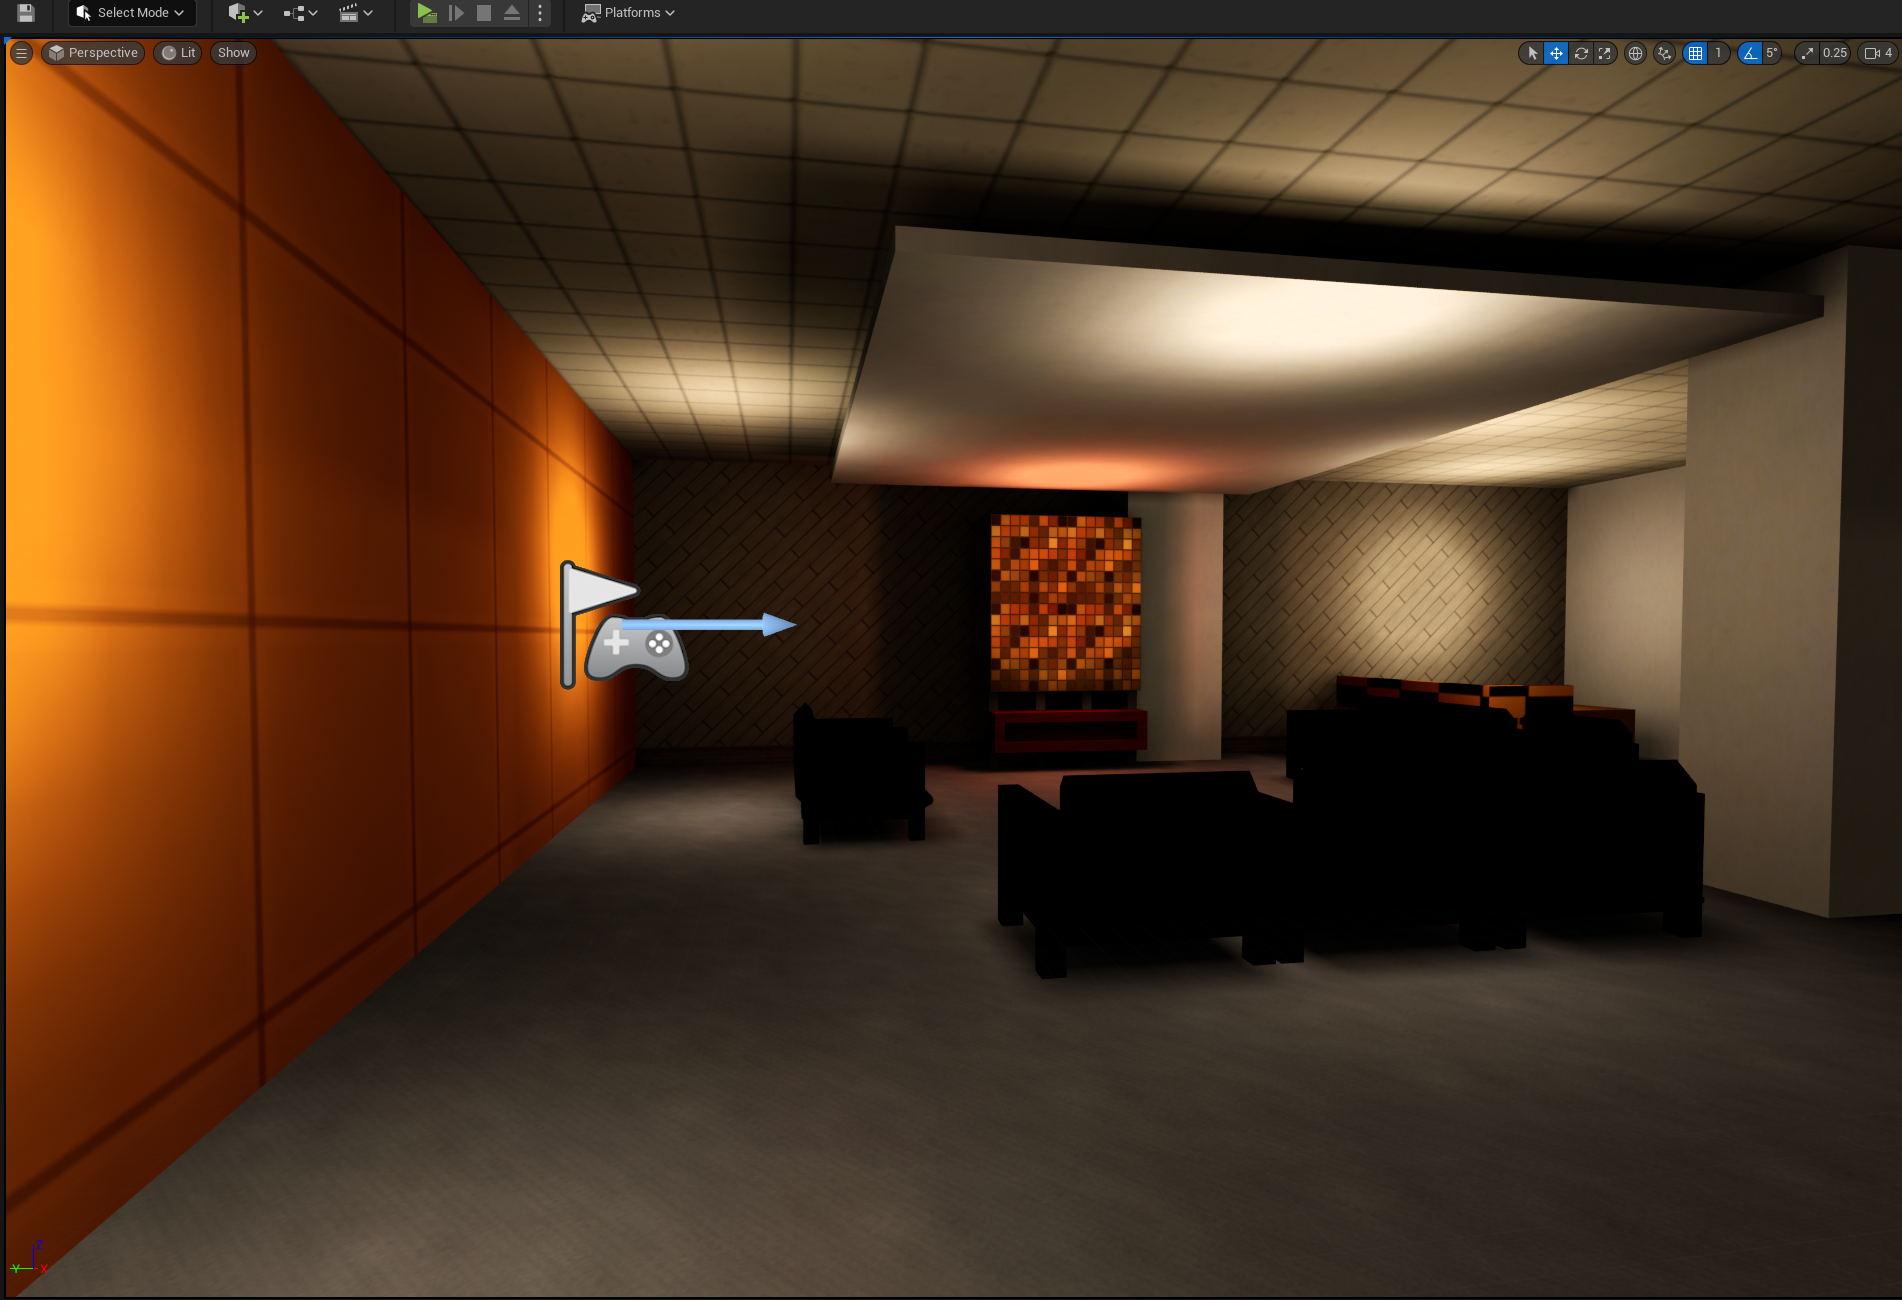
The chairs in the above picture are static meshes - they’re not part of the map geometry. But that means they don’t pick up on our custom lightmapping. We could add Unreal lights to the scene to mimic the lights from our editor, but that will cause Unreal to apply its own lighting to the scene, resulting in crisp shadows that aren’t in line with what we’re trying to achieve.
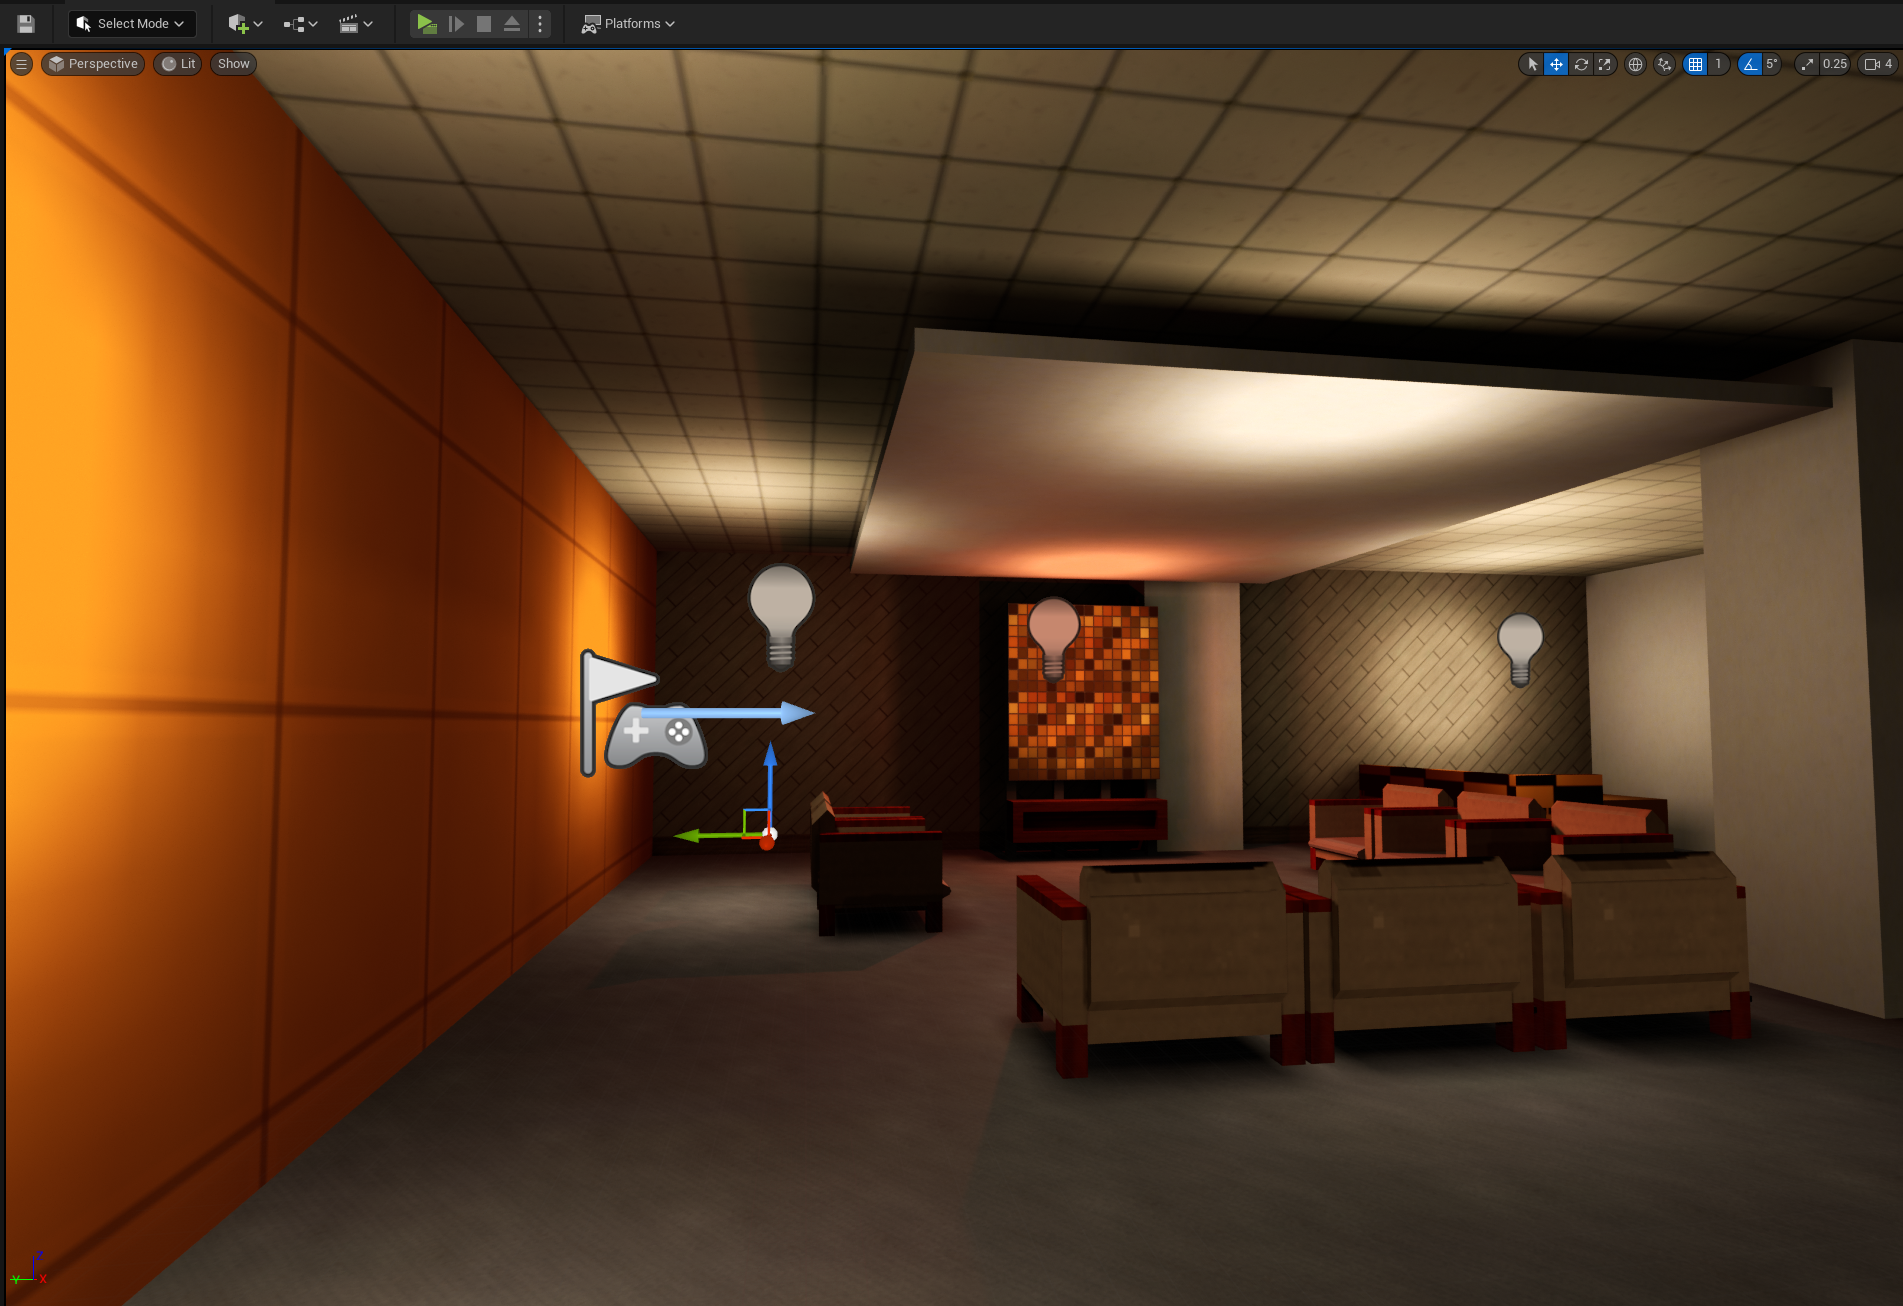
But we still have to light our static meshes, and populate lightvol info for Unreal. The solution to this is Light Channels, which gives us the ability to make a game object unaffected by lights in a given channel. If we set our map’s mesh to only be affected by lighting channel 1, then we’re in the clear.
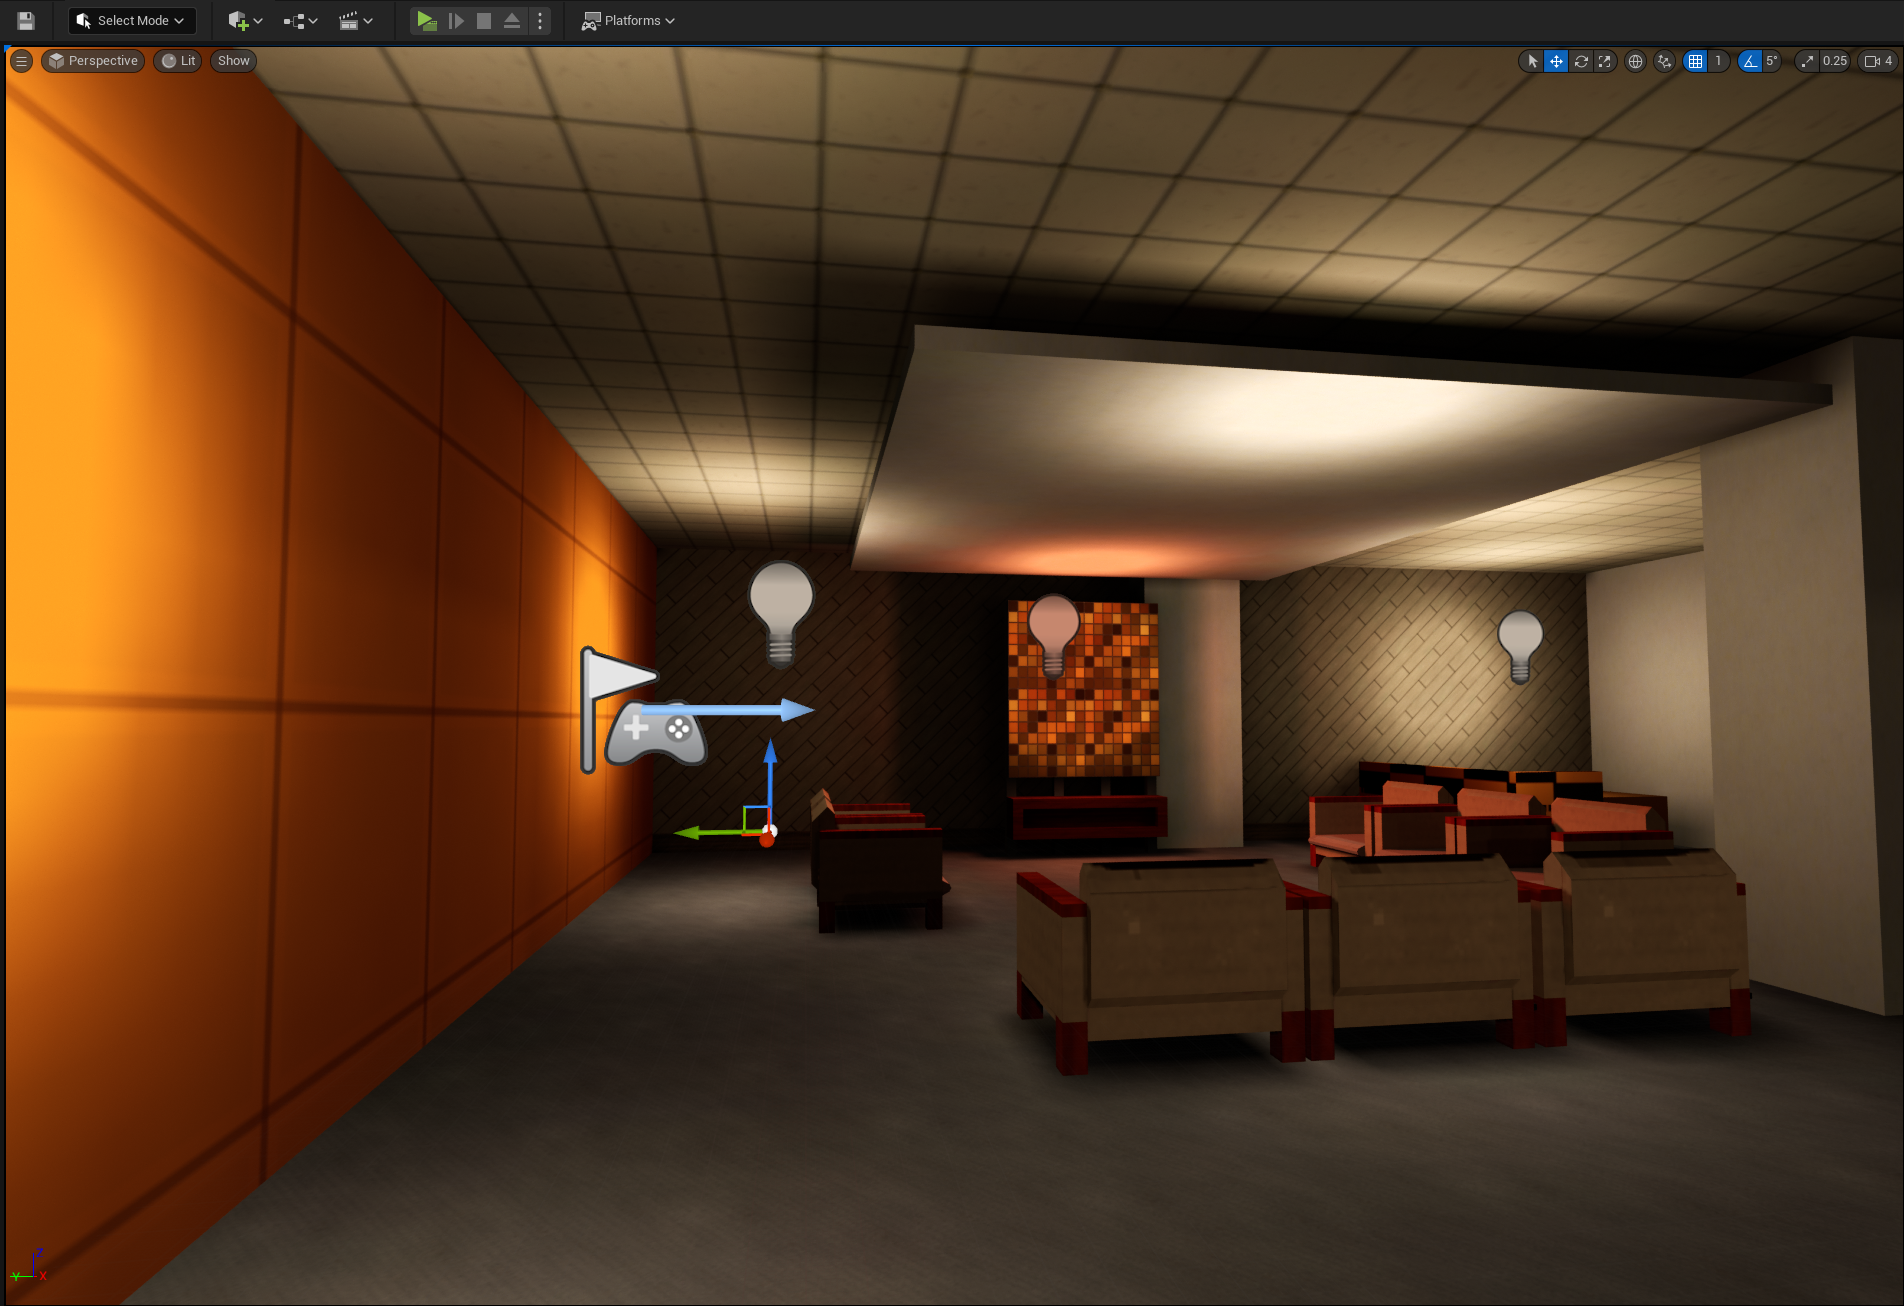
We can place static lights to roughly match our map lights, and bake static lighting into (Unreal) lightmaps for non-level-geometry meshes.
Bypassing Unreal lights - dynamic lights
One last thing, if we want to have lights that change (strobing, muzzle flashes, flashlights, etc), we need to make sure those dynamic lights affect lighting channel 0 and 1, since they should equally affect the map geometry and meshes within the scene.
You might notice that static lights can only affect channel 0, that’s important. Our dynamic lights must be channel 1, and all static lights (to populate lightvol) must be channel 0.
Why can’t you just…
People familiar with any number of things mentioned will probably think this problem can be solved easier. Unfortunately, unless you’re comfortable with compromising on the goal, it can’t.
Use ASE export?
q3map2 has a -convert flag that can turn a BSP into an ASE model. That’s cool, but doesn’t atlas lightmaps together, doesn’t include lightmap coords (or re-uv them) or vertex colors. It’s just triangles. Without at least the lightmap coordinates, this isn’t possible.
Use Unreal better?
Lightmap resolution is tunable, and i’m sure you can get something like a y2k-lighting effect in Unreal without all this, sure. But the workflow i’m aiming for is to design maps (and, frankly, models) in Trenchbroom, and to press a button and have that geometry + lighting appear in Unreal. I don’t want to build static mesh tilesets and design maps with them in Unreal, I want to go full brushwork and design the game the old way.
Because, frankly, it’s how I grew up learning to do this stuff, and I have both familiarity and fondness to it.
Use the original engines?
quake2 and quake3 have been open source for decades. ioquake has active development and encourages new games (although the primary maintainer has uh, questionable social views). Why not just use those?
They’re engines practically in name only. They’re developed to capture a very specific game in a very specific point in time. There hasn’t been much work to modernize them, or make more tools. For instance, Unreal has Niagara, EQS, UMG, sequencer, Kismet, data tables, movement components, collision channels, animBP (including stuff like fabrik, IK, configurable crossfades, etc), metasounds, support for instant import / customization of hundreds of content formats, tutorials, examples, and oh by the way an entire codebase that makes ray tracing, factions, save/load systems, easings, and tons more stuff dead easy to work with.
You’re missing out on decades of quality of life for developers, and that’s no exaggeration. A trivial game in UE5 might take months in ioquake. That’s acceptable for some studios (i will always hold a candle for Blendo Games for using q2 and q3 for so long, gravity bone). But personally I just can’t swing it.
Make your own engine?
I’ve done that more than once, and I’m in my 30’s now and have to admit I just don’t have the energy for it anymore. All I want is to have these lightmaps in an Unreal project, I don’t really want to go about solving all the thousands of problems required to write something from scratch.
Update; q3map2 vs bloodmap
2023-07-07 update note
The screenshots produced above all use q3map2, but i have since moved to bloodmap.
Unfortunately none of the builds at the official q3map2 site work (complaining variously about different libraries even when they’re present), and seem to have different versions per platform. Fortunately, GtkRadiant comes packaged with a working q3map2.
Unfortunately again, all builds are 32-bit (meaning a 2gb memory limit, which leads to OOM issues very quickly when using supersampling), and while I can’t vouch for how stable q3map2 is, it constantly produced light artifacts at the seams of brushes, and any attempt at using ambient light would lead to some number of faces "fuzzing out" with black artifacts. I picked and prodded at this for days, convinced my atlassing must be at fault, but the artifacts came from the lightmaps simply being… wrong. The UV on nearest would pull in a pixel from an adjacent lightmap when it shouldn’t; doing things like -border made the problem extremely clear, and manually debugging the bsp itself (which includes lightmap pixel regions per-face) emphasized the mismatch. I don’t entirely understand why, but q3map2 is just not correct.
bloodmap suffers none of these issues, which is why i use it. My typical iteration now looks like;
bloodmap -fs_basepath %contentpath% -fs_game %gamename% -meta -bsp -samplesize 12 "%mapname%" || exit /b
bloodmap -fs_basepath %contentpath% -fs_game %gamename% -light -nogrid -nostyles -stitch -filter -super 2 "%mapname%" || exit /b
The samplesize here refers to the world size of a luxel. As mentioned in Brian Hook’s talk, they aim for about one luxel per 2sqft. The dimensions of your game may differ (mine, entirely by coincidence, nearly exactly match quake3 dimensions). Note that lower sample size can lead to more obvious jaggy edges between samples. Paradoxically, the effect older games of the era had depends on a surprisingly generous sample size.
Footnotes
A. In all the pictures shown, I use in-editor screenshots from a UE5-based project. Even if I say "Quake can do this", what i’m really showing is the result as rendered through the project, just switching between lighting strategies to emphasize the differences. The pictures can also be seen at higher resolutions by clicking.
B. All q3-derived lighting was created with the following;
q3map2 -light -super 2 -samplesize 1
C. map compilers require a .map file to have light entities to make lights (obviously). An example trenchbroom fgd entry for this is included.
D. Comparison images between unreal lighting and quake lighting don’t have precisely the same lights in the same places. It’s close enough, but given how fill lights work in both systems, the screenshots show slightly different light placements.
